

3/4/14
I've Moved!
I've decided to stop updating Knit Nat AK and post solely on Alaska Knit Nat. See you on Wordpress!
2/23/14
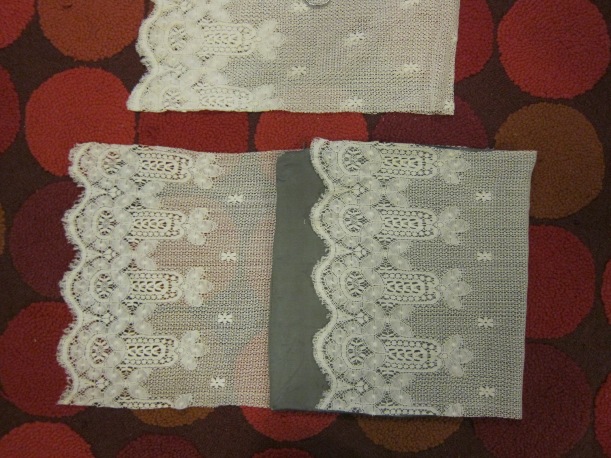
Quick Craft - Lace Curtains to Pillowcases
Our living room throw pillows needed an upgrade. At $20-30 a pop, I wasn't about to buy two new ones, so I dug through my fabric stash and found an old lace curtain panel. Two cuts and four seams later I had a couple of gorgeous throw pillows.

Here's how.
Materials:
1 lace curtain panel
2 square pillow forms
straight pins
sewing machine

Directions. Lay out your curtain panel on the floor and place your pillow on top of it to measure how much fabric to cut. If you have a removable slip cover on the pillow already, then remove it and use the cover as a guide. Cut the curtain widthwise, leaving a half an inch of seam allowance on the top and bottom edge.

I made an envelope slip cover, but instead of the envelope being on the back side, like most throw pillows, it is on the front because the lace trim is already a finished edge and it looks so pretty overlapped.
Lay your pillow on the long width of fabric and figure out how you want it to overlap. Fold one edge over the pillow and the other edge over. Mark where you folded and remove the pillow. Refold the lace and pin the raw edges in place.
Sew across both edges. Turn right side out and stuff your pillow inside. That's it! Repeat with second pillow.


Questions? Leave me a comment!
2/17/14
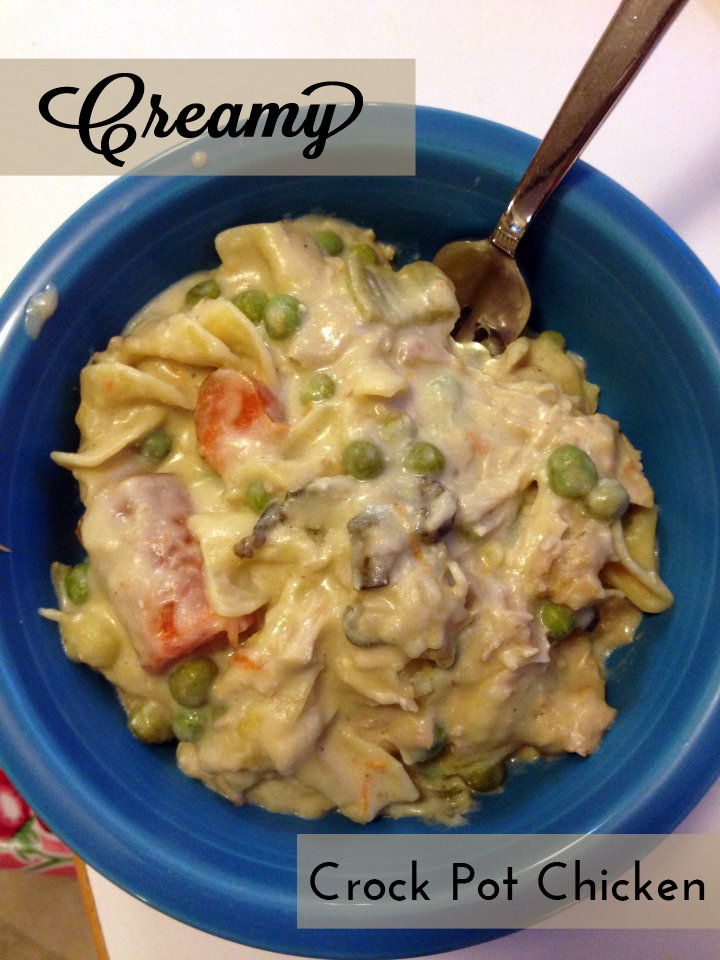
Creamy Crock Pot Chicken
My son and I both had the day off (thanks Abe and George!) and by 1:30 p.m. I realized I hadn't taken any meat out of the freezer for dinner.
I've seen slow cooker recipes where you put frozen chicken right in with a bunch of other "cream of" somethings and cook the hell out of it and get some sort of slop. Yes, I wanted to make that, mainly because I didn't plan anything for dinner and I was way too lazy and tired to go to the store.
What I ended up with was just what most people describe on their "crock pot chicken" Pinterest posts -- easy, creamy and delicious!
The secret to my dinner's success was the homemade condensed cream of mushroom soup that I concocted because I didn't have a can of it in my pantry. I followed this basic recipe from Pinch Of Yum, but sautéed 2 cups of sliced baby portobello mushrooms and 1/2 an onion, finely chopped, with half a stick of butter before adding the stock and milk. I also added smoked paprika, thyme and oregano to the recipe. It yielded quite a bit of thick soup and was perfect for my crock pot concoction, which was loosely based on this recipe from Coersfamily.com.
Creamy Crock Pot Chicken
Serves about 4
What you'll need:
2-4 pieces frozen chicken (I used skinless thighs)
1.5 cups condensed cream of mushroom soup (or one can of the store bought stuff)
1 brick of cream cheese (I used neufchâtel)
1 bay leaf
1-2 potatoes, quartered
2 carrots, cut into large chunks
1 celery rib, chopped
1 cup frozen peas
1 cup dry egg noodles
1/2 cup chicken stock
Directions:
Place your frozen chicken pieces in the slow cooker and surround it with the carrots, potatoes, celery and bay leaf. Pour over the cream of mushroom soup. Break up the cream cheese and add it to the slow cooker. Cover and cook on low for 4-6 hours. After a few hours, stir it and break up the chicken if you can.
Forty-five minutes before serving stir in the peas and egg noodles, making sure to coat them thoroughly. If it's already looking a bit thick, add 1/2 cup chicken stock. Cover and cook on high.
Remove bay leaf and roughly cut up carrots and potatoes before serving.
Savor the fact that your entire family should adore this meal that took little effort and zero defrosting.
2/9/14
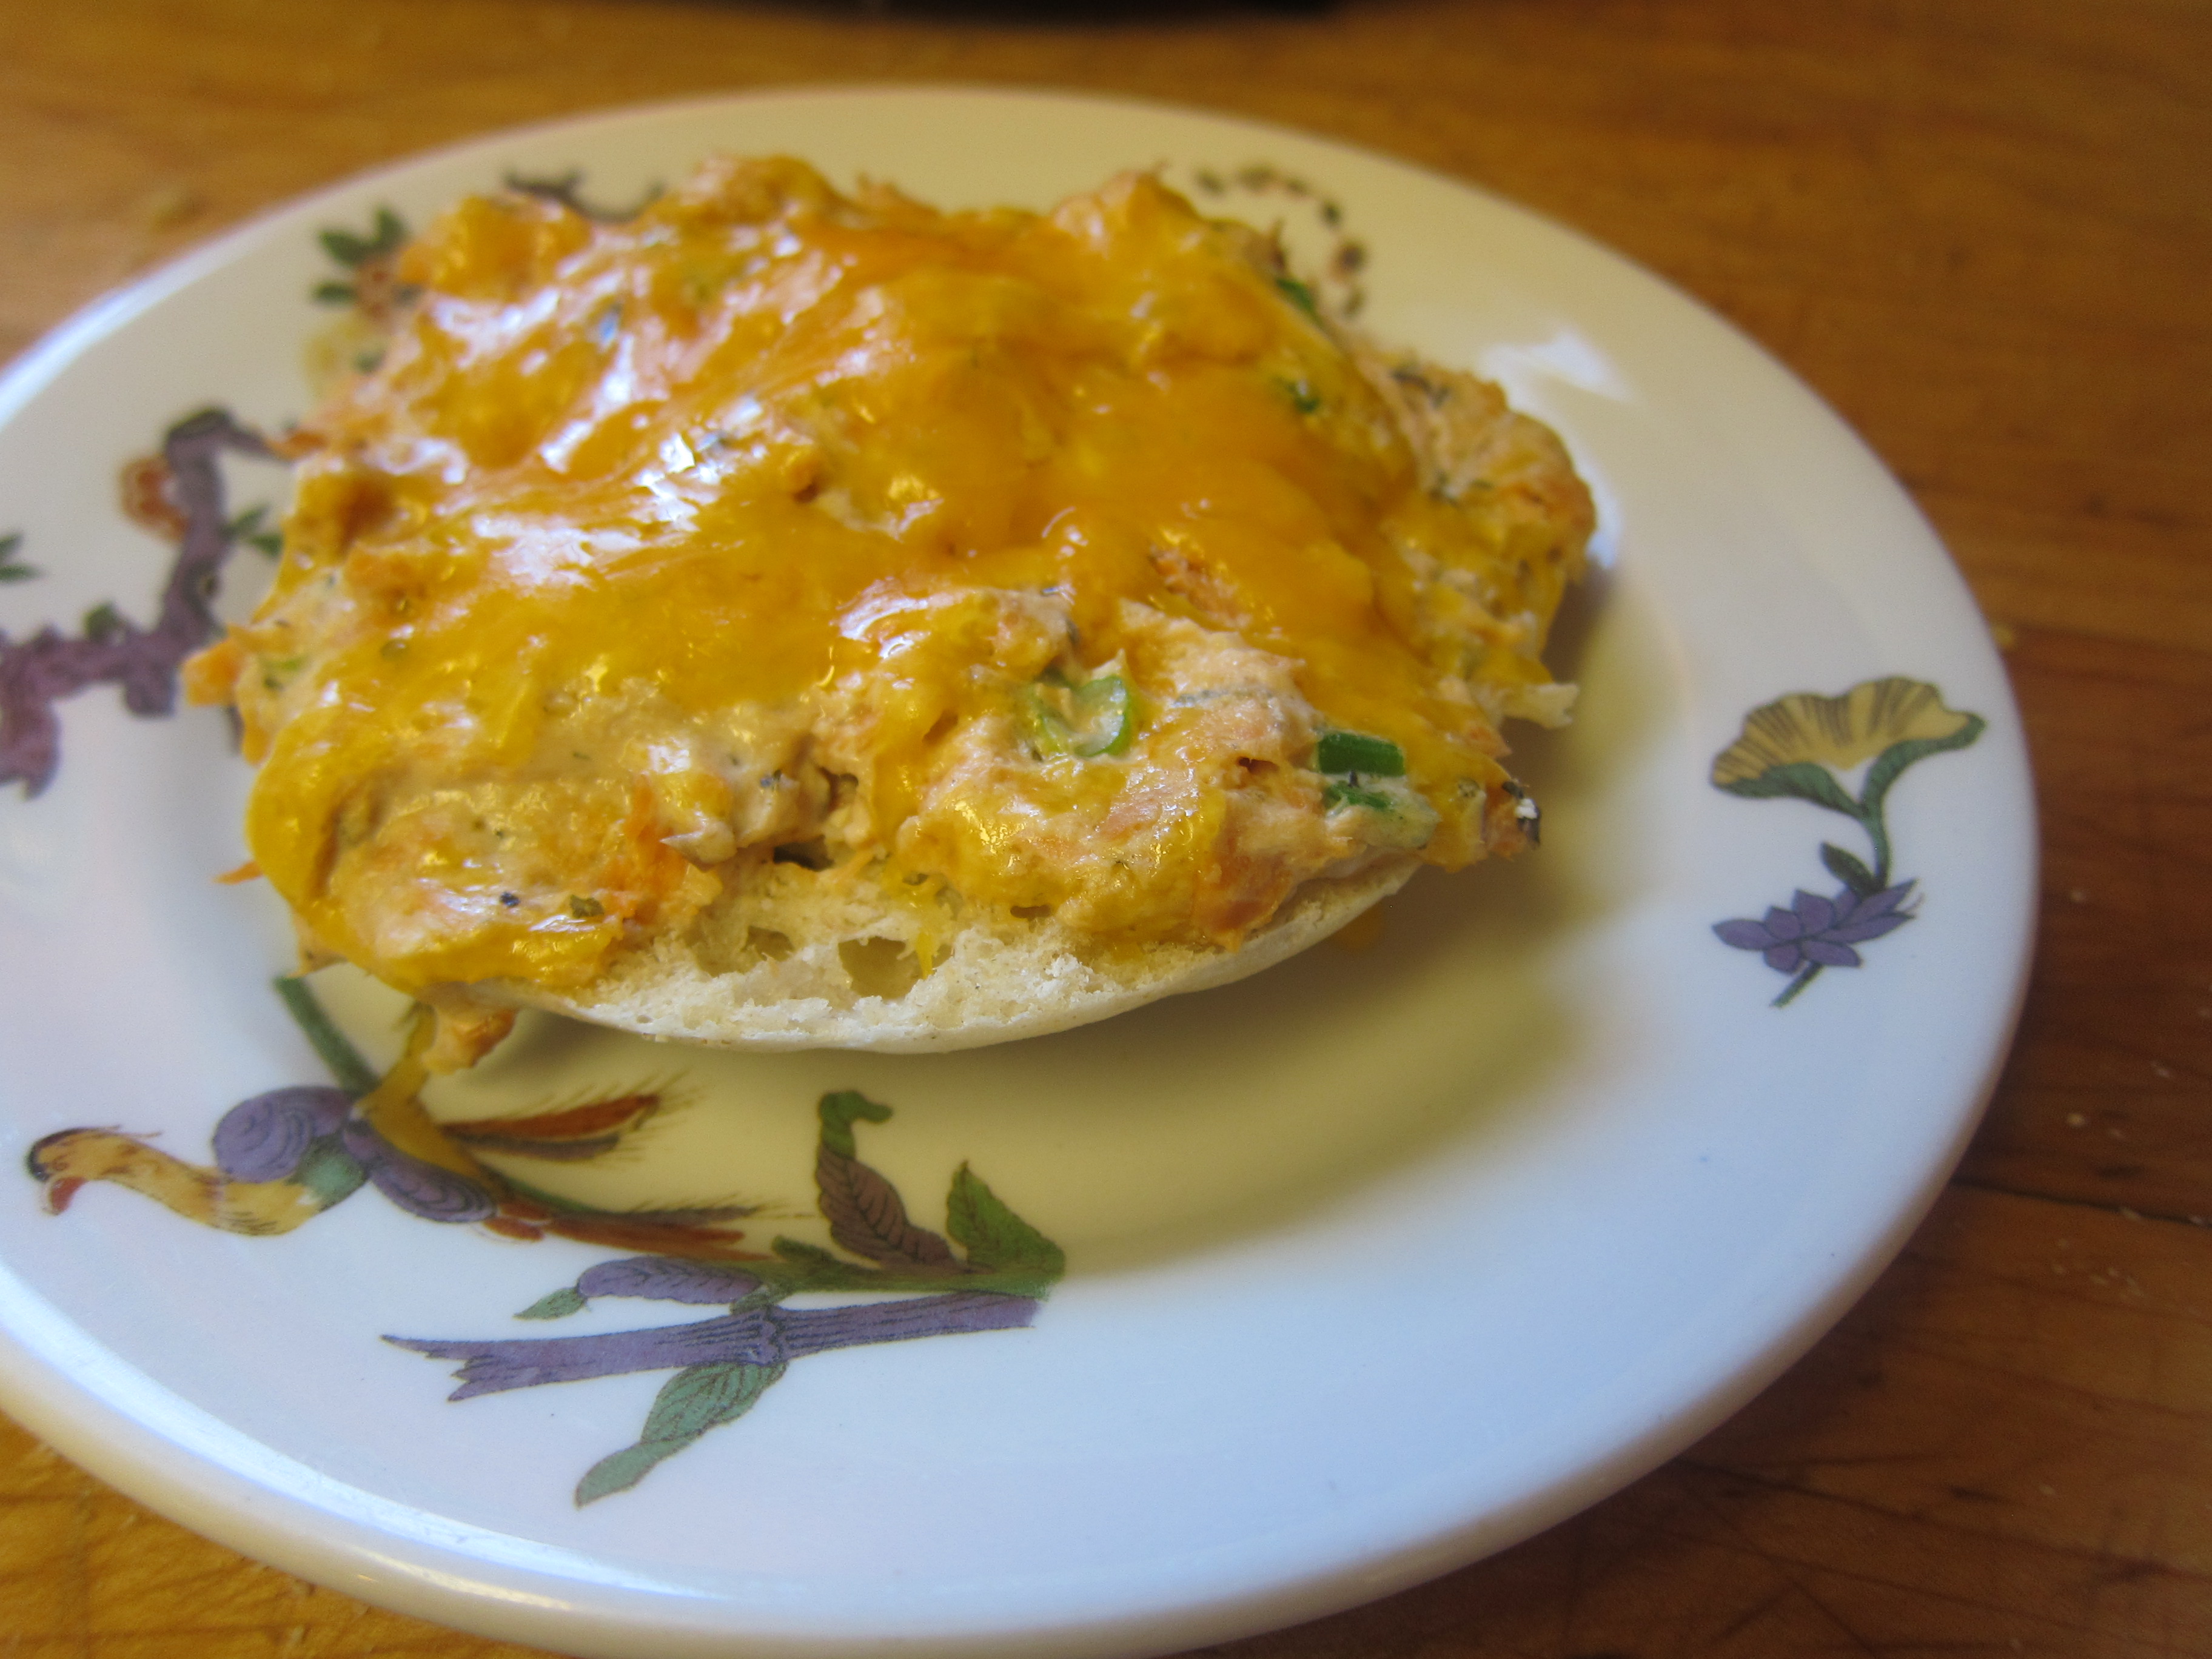
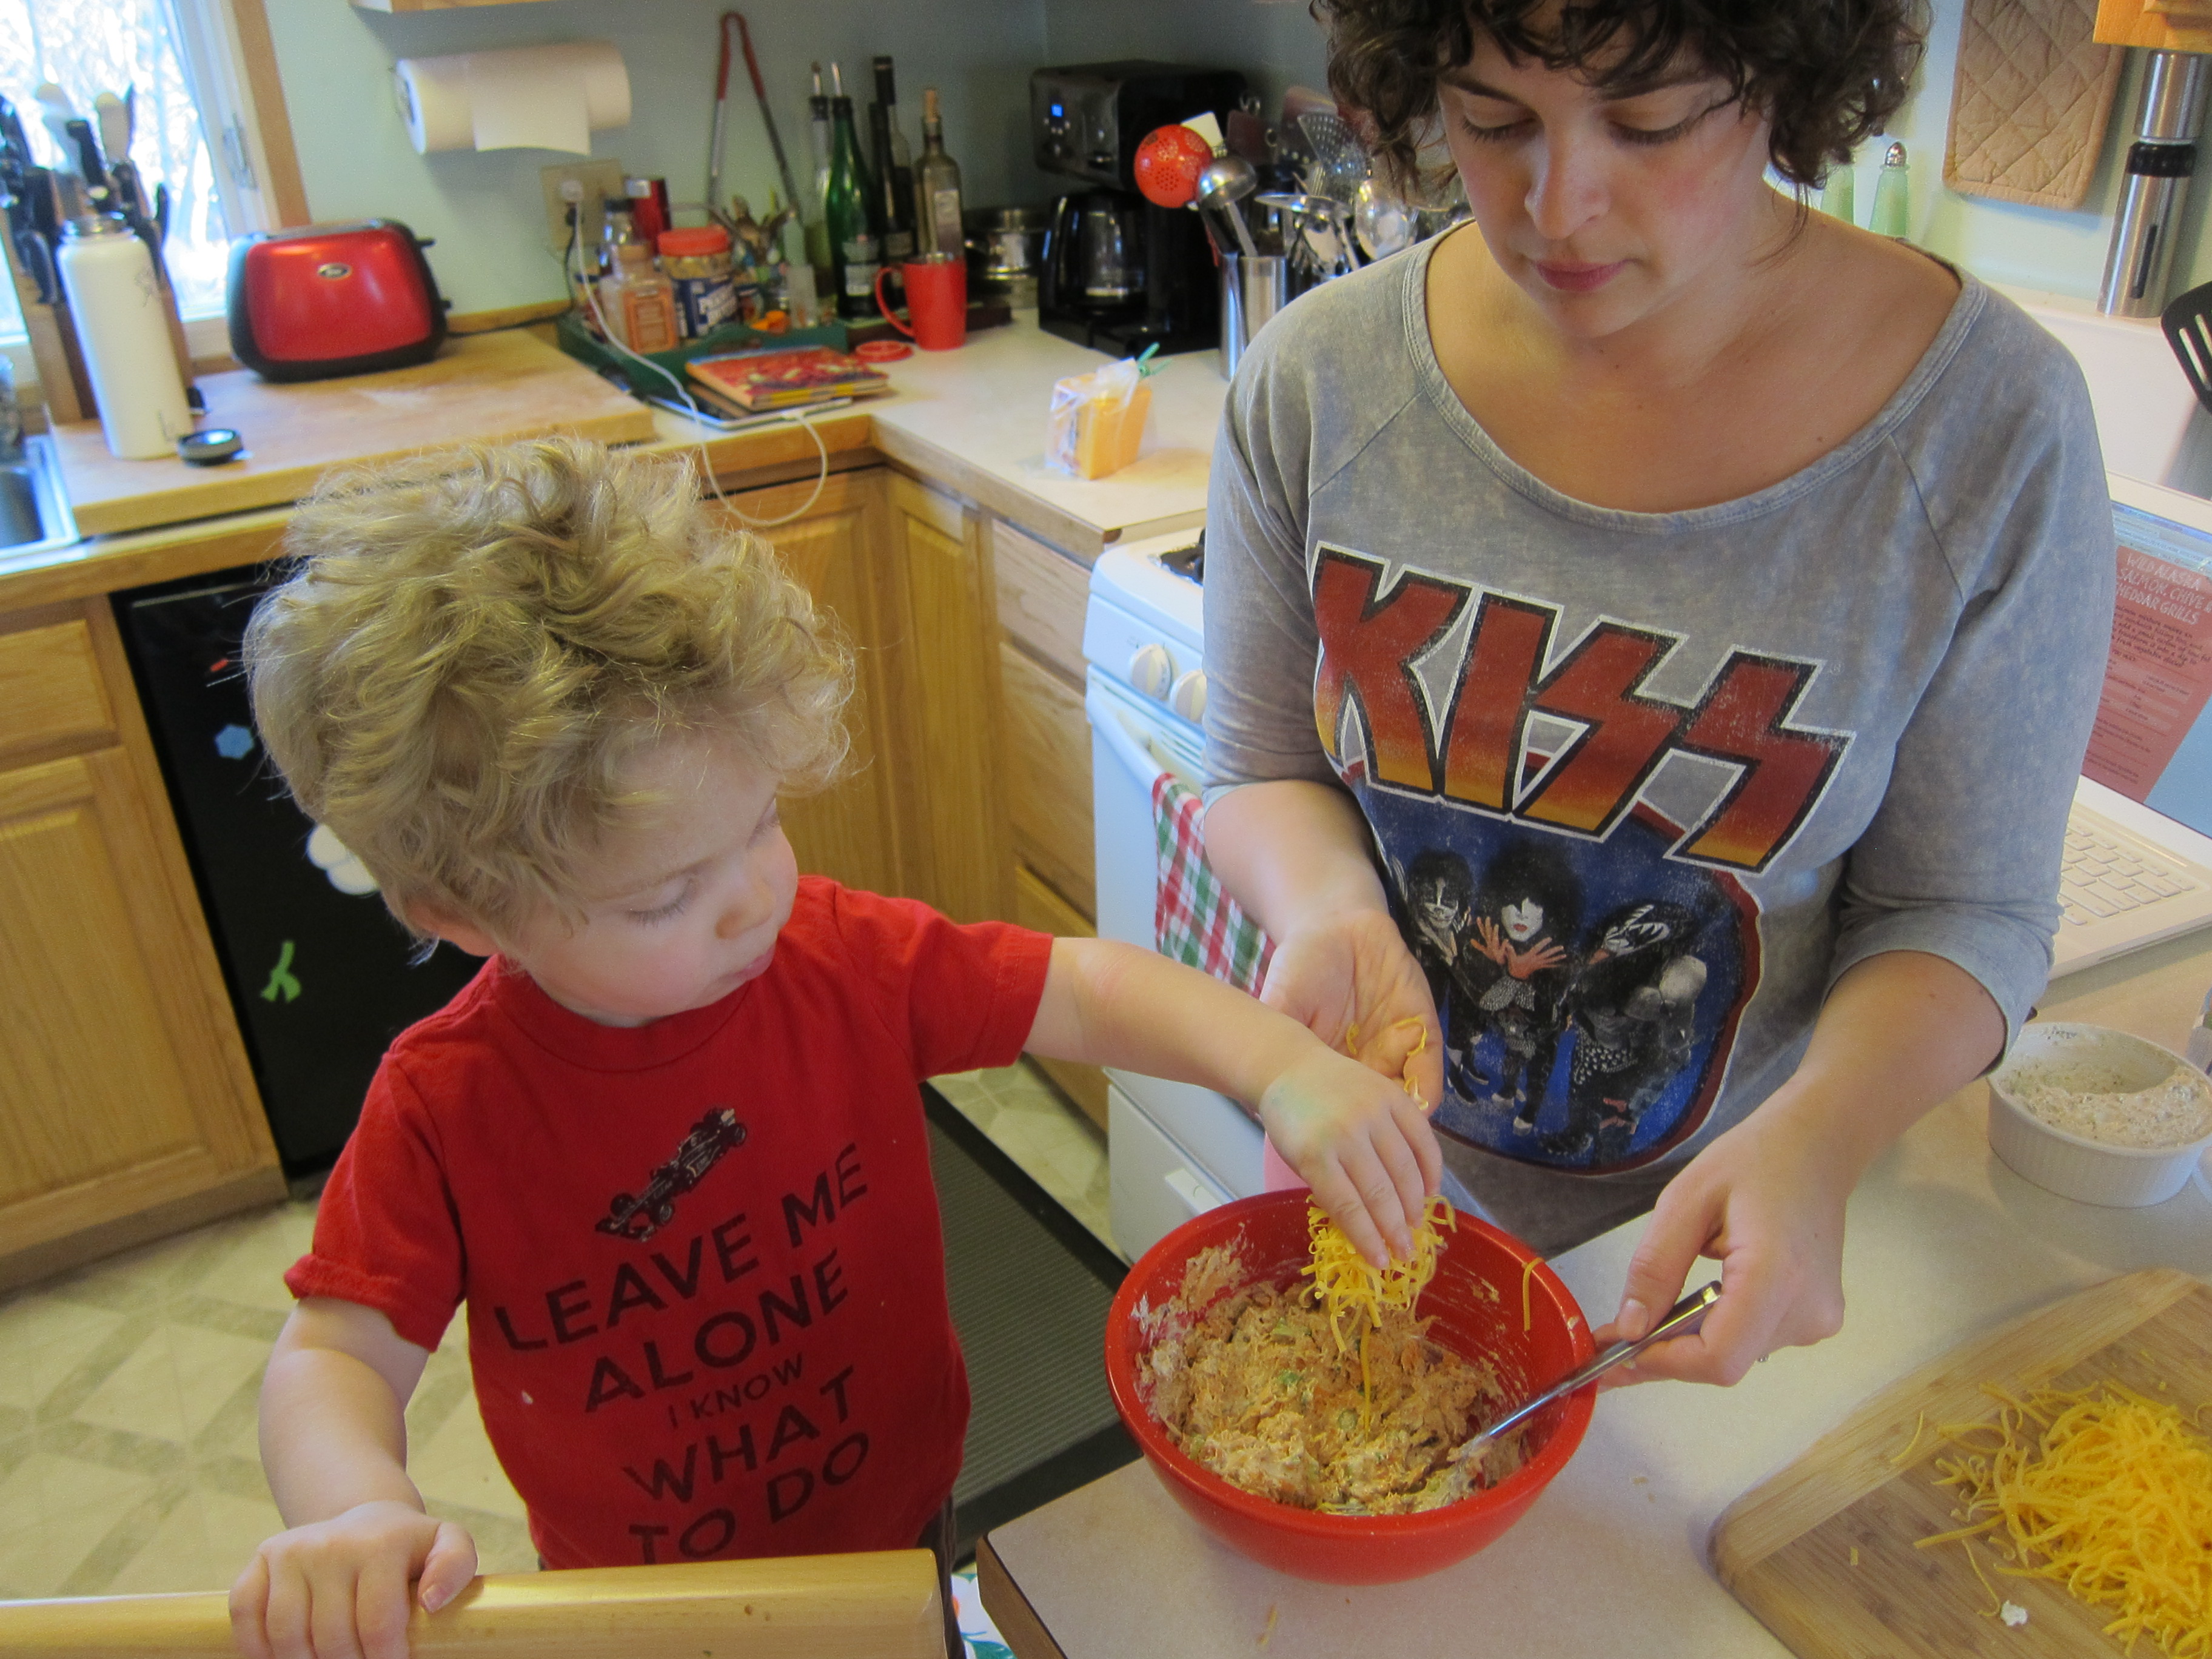
Salmon Cheddar Grills -- A Quick and Healthy Snack
I was invited to test a recipe from Alaska Seafood Marketing Institute's new e-cookbook, "Alaska Style -- Recipes for Kids," which is chock full of healthy snacks and meals for children and adults.
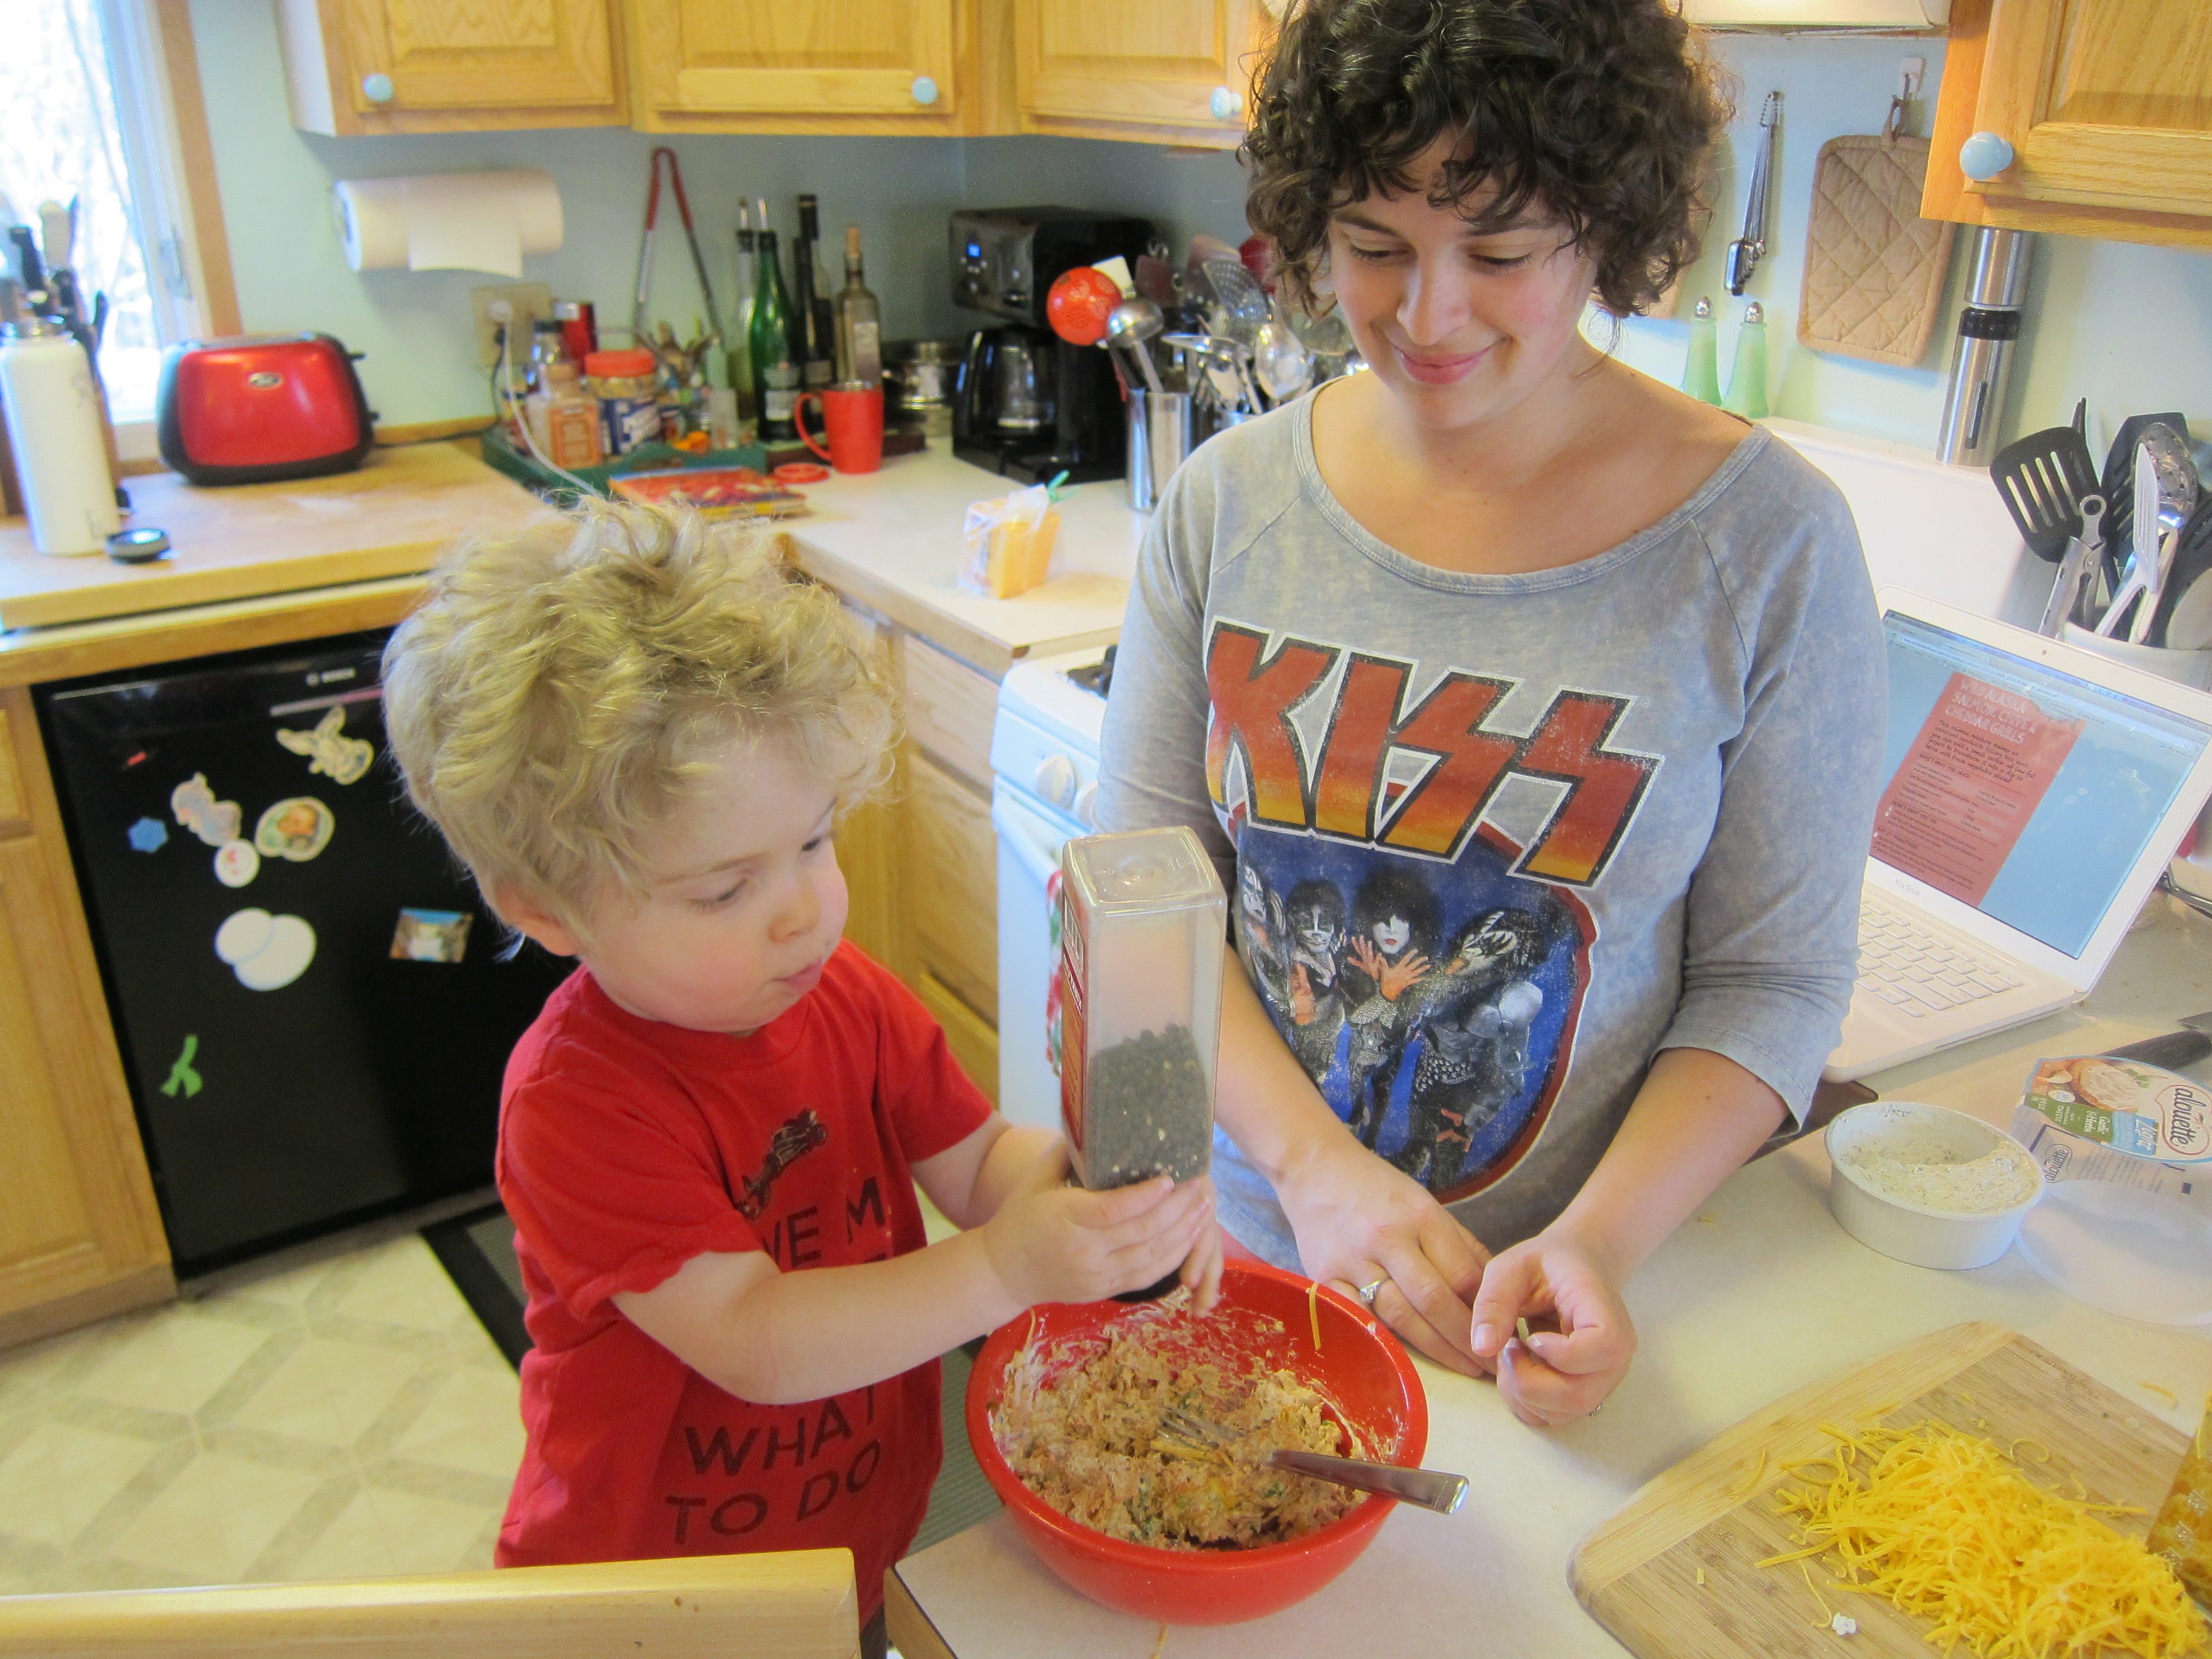
I've not cooked much with my 21-month-old son, but last week he did a great job of sprinkling cheese on some focaccia I was baking, so I knew he'd be able to assist in the salmon cheddar grills we whipped up for lunch. When I mentioned I would need his help in the kitchen, Jack explained to his dad, "Help mama make snack," so he knew something special was about to happen.
These salmon grills are perfect if you're introducing fish to your little picky eater as the fishy taste is almost completely disguised by the cheesiness. Jack eats just about anything so I knew they'd be a hit. They were easy to prepare and after a few minutes in the toaster oven we had lunch for two.
Salmon Cheddar Grills
For the original recipe, check out the e-cookbook "Alaska Style -- Recipes for Kids"
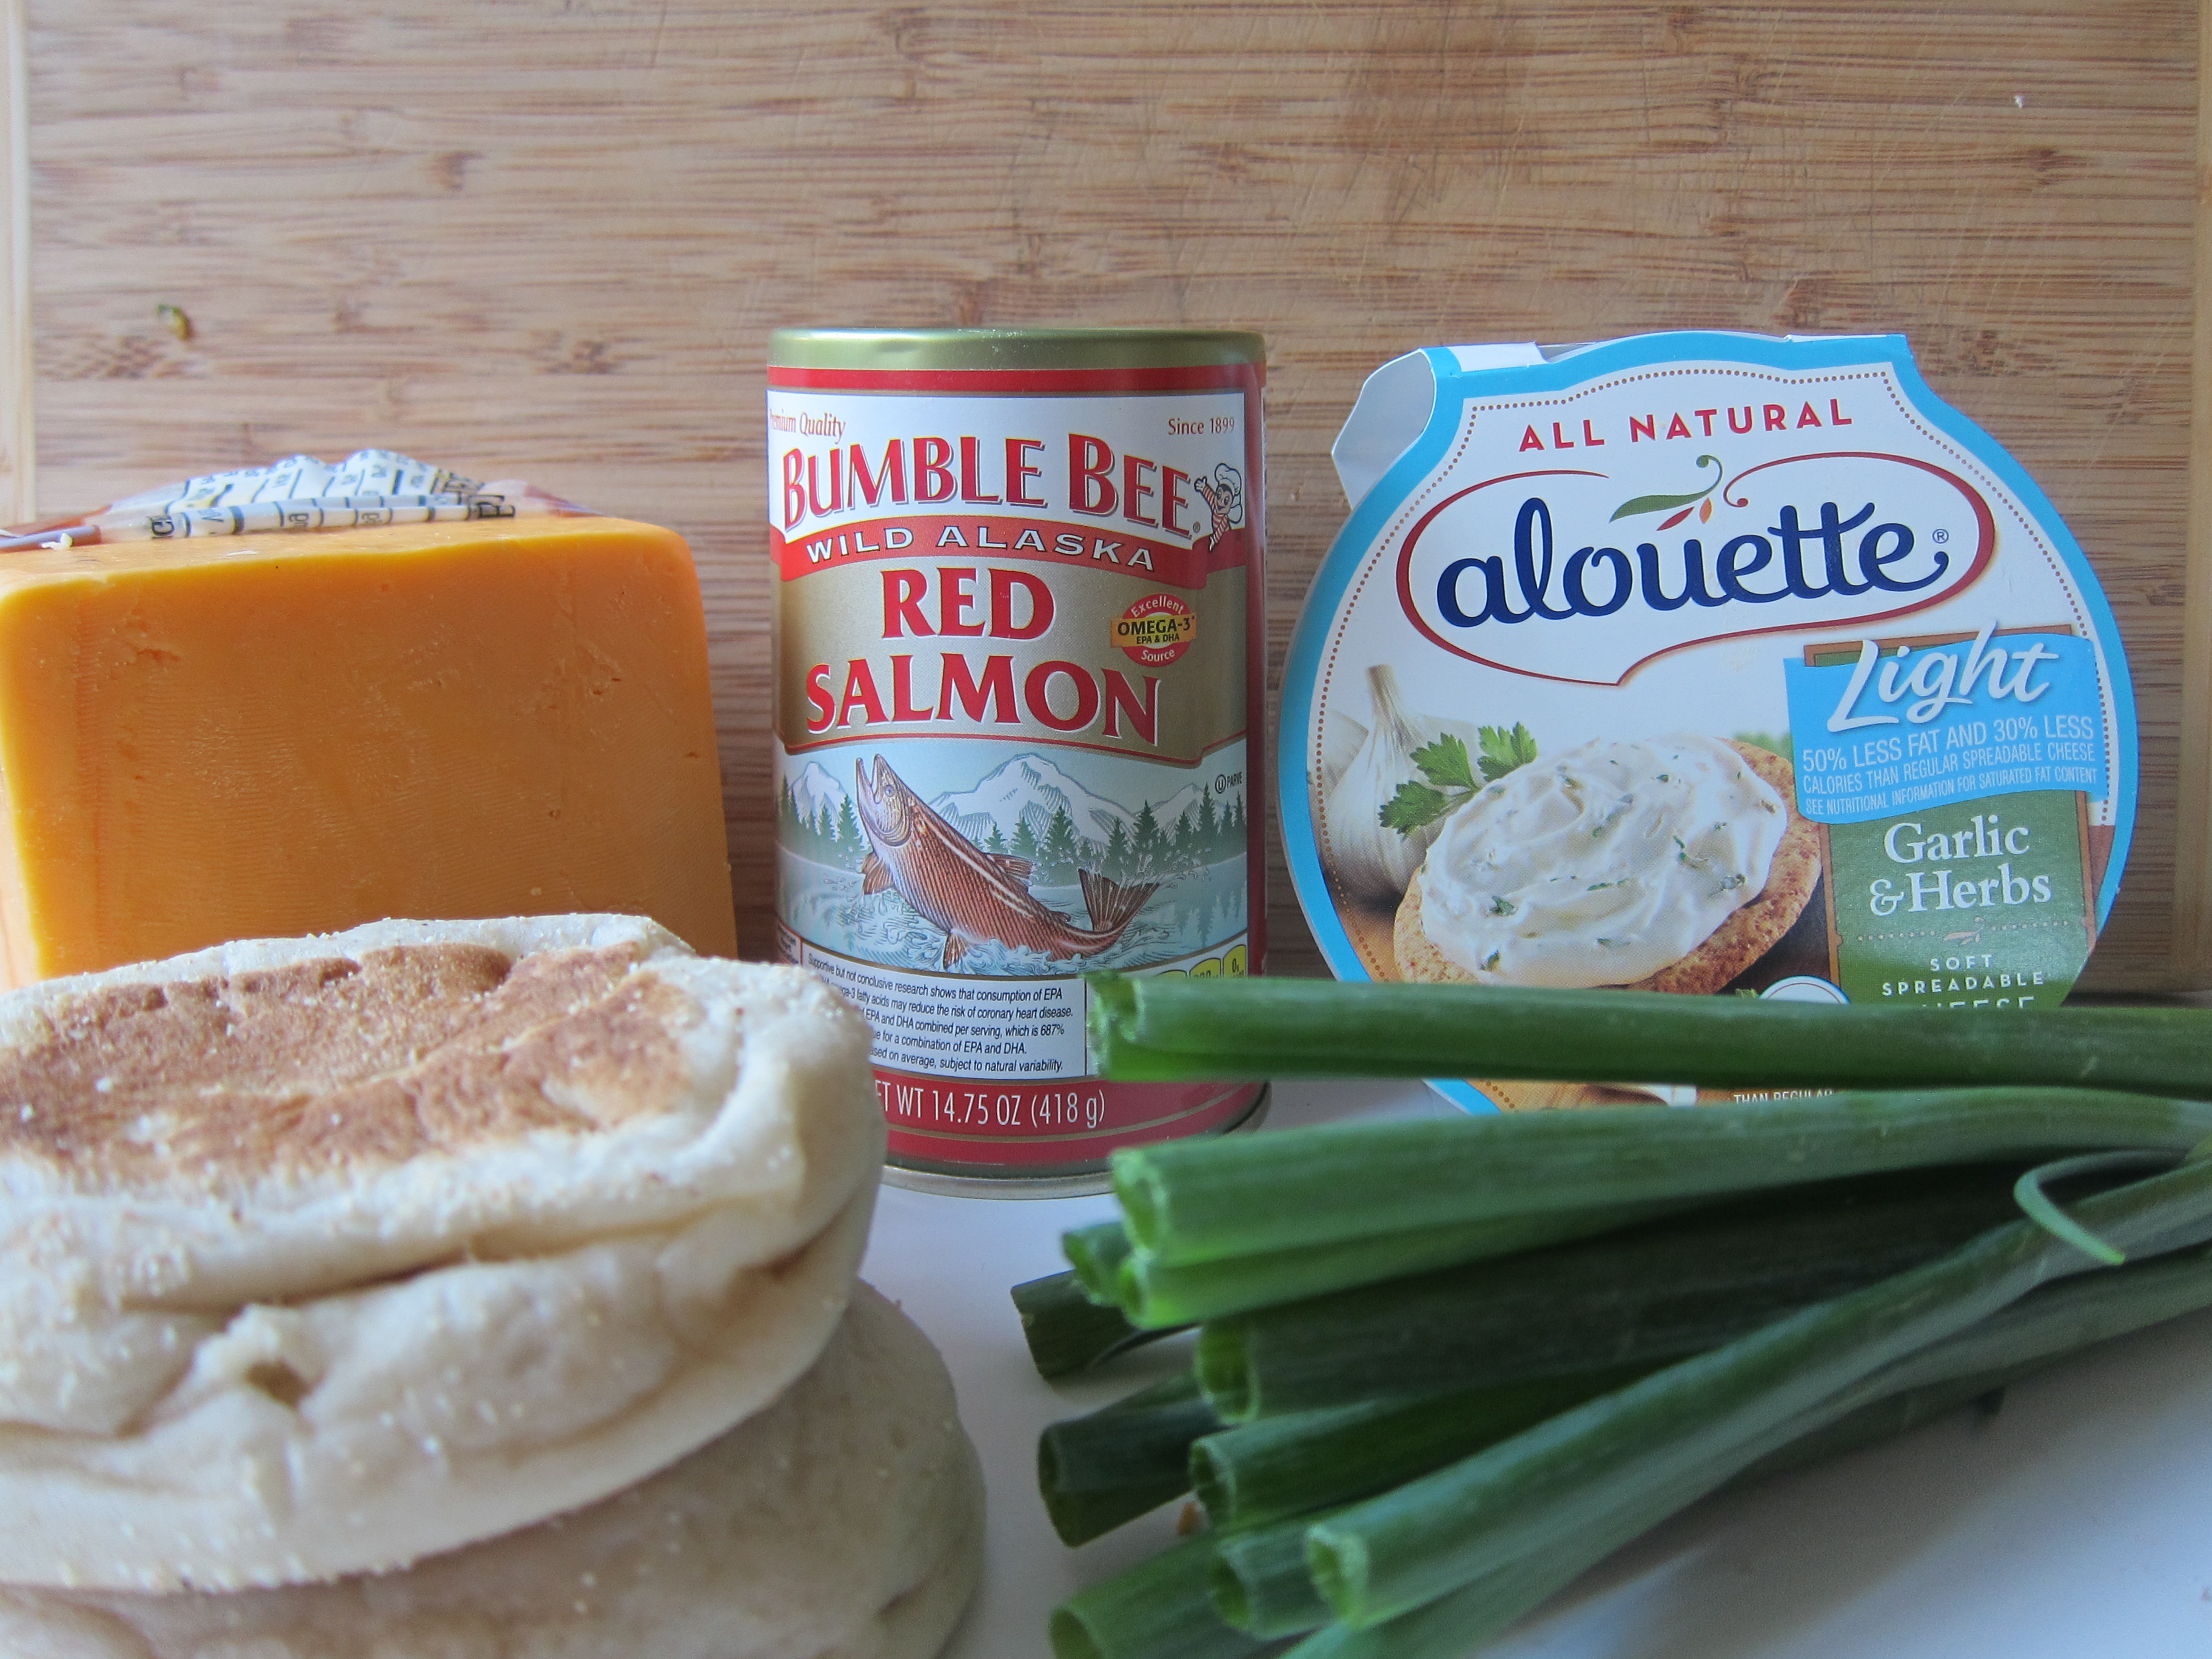
Ingredients:
1, 7.5-oz. can of wild Alaska salmon, pink or red
2 oz. light garlic and herb cheese spread (Alouette or Laughing Cow is good)
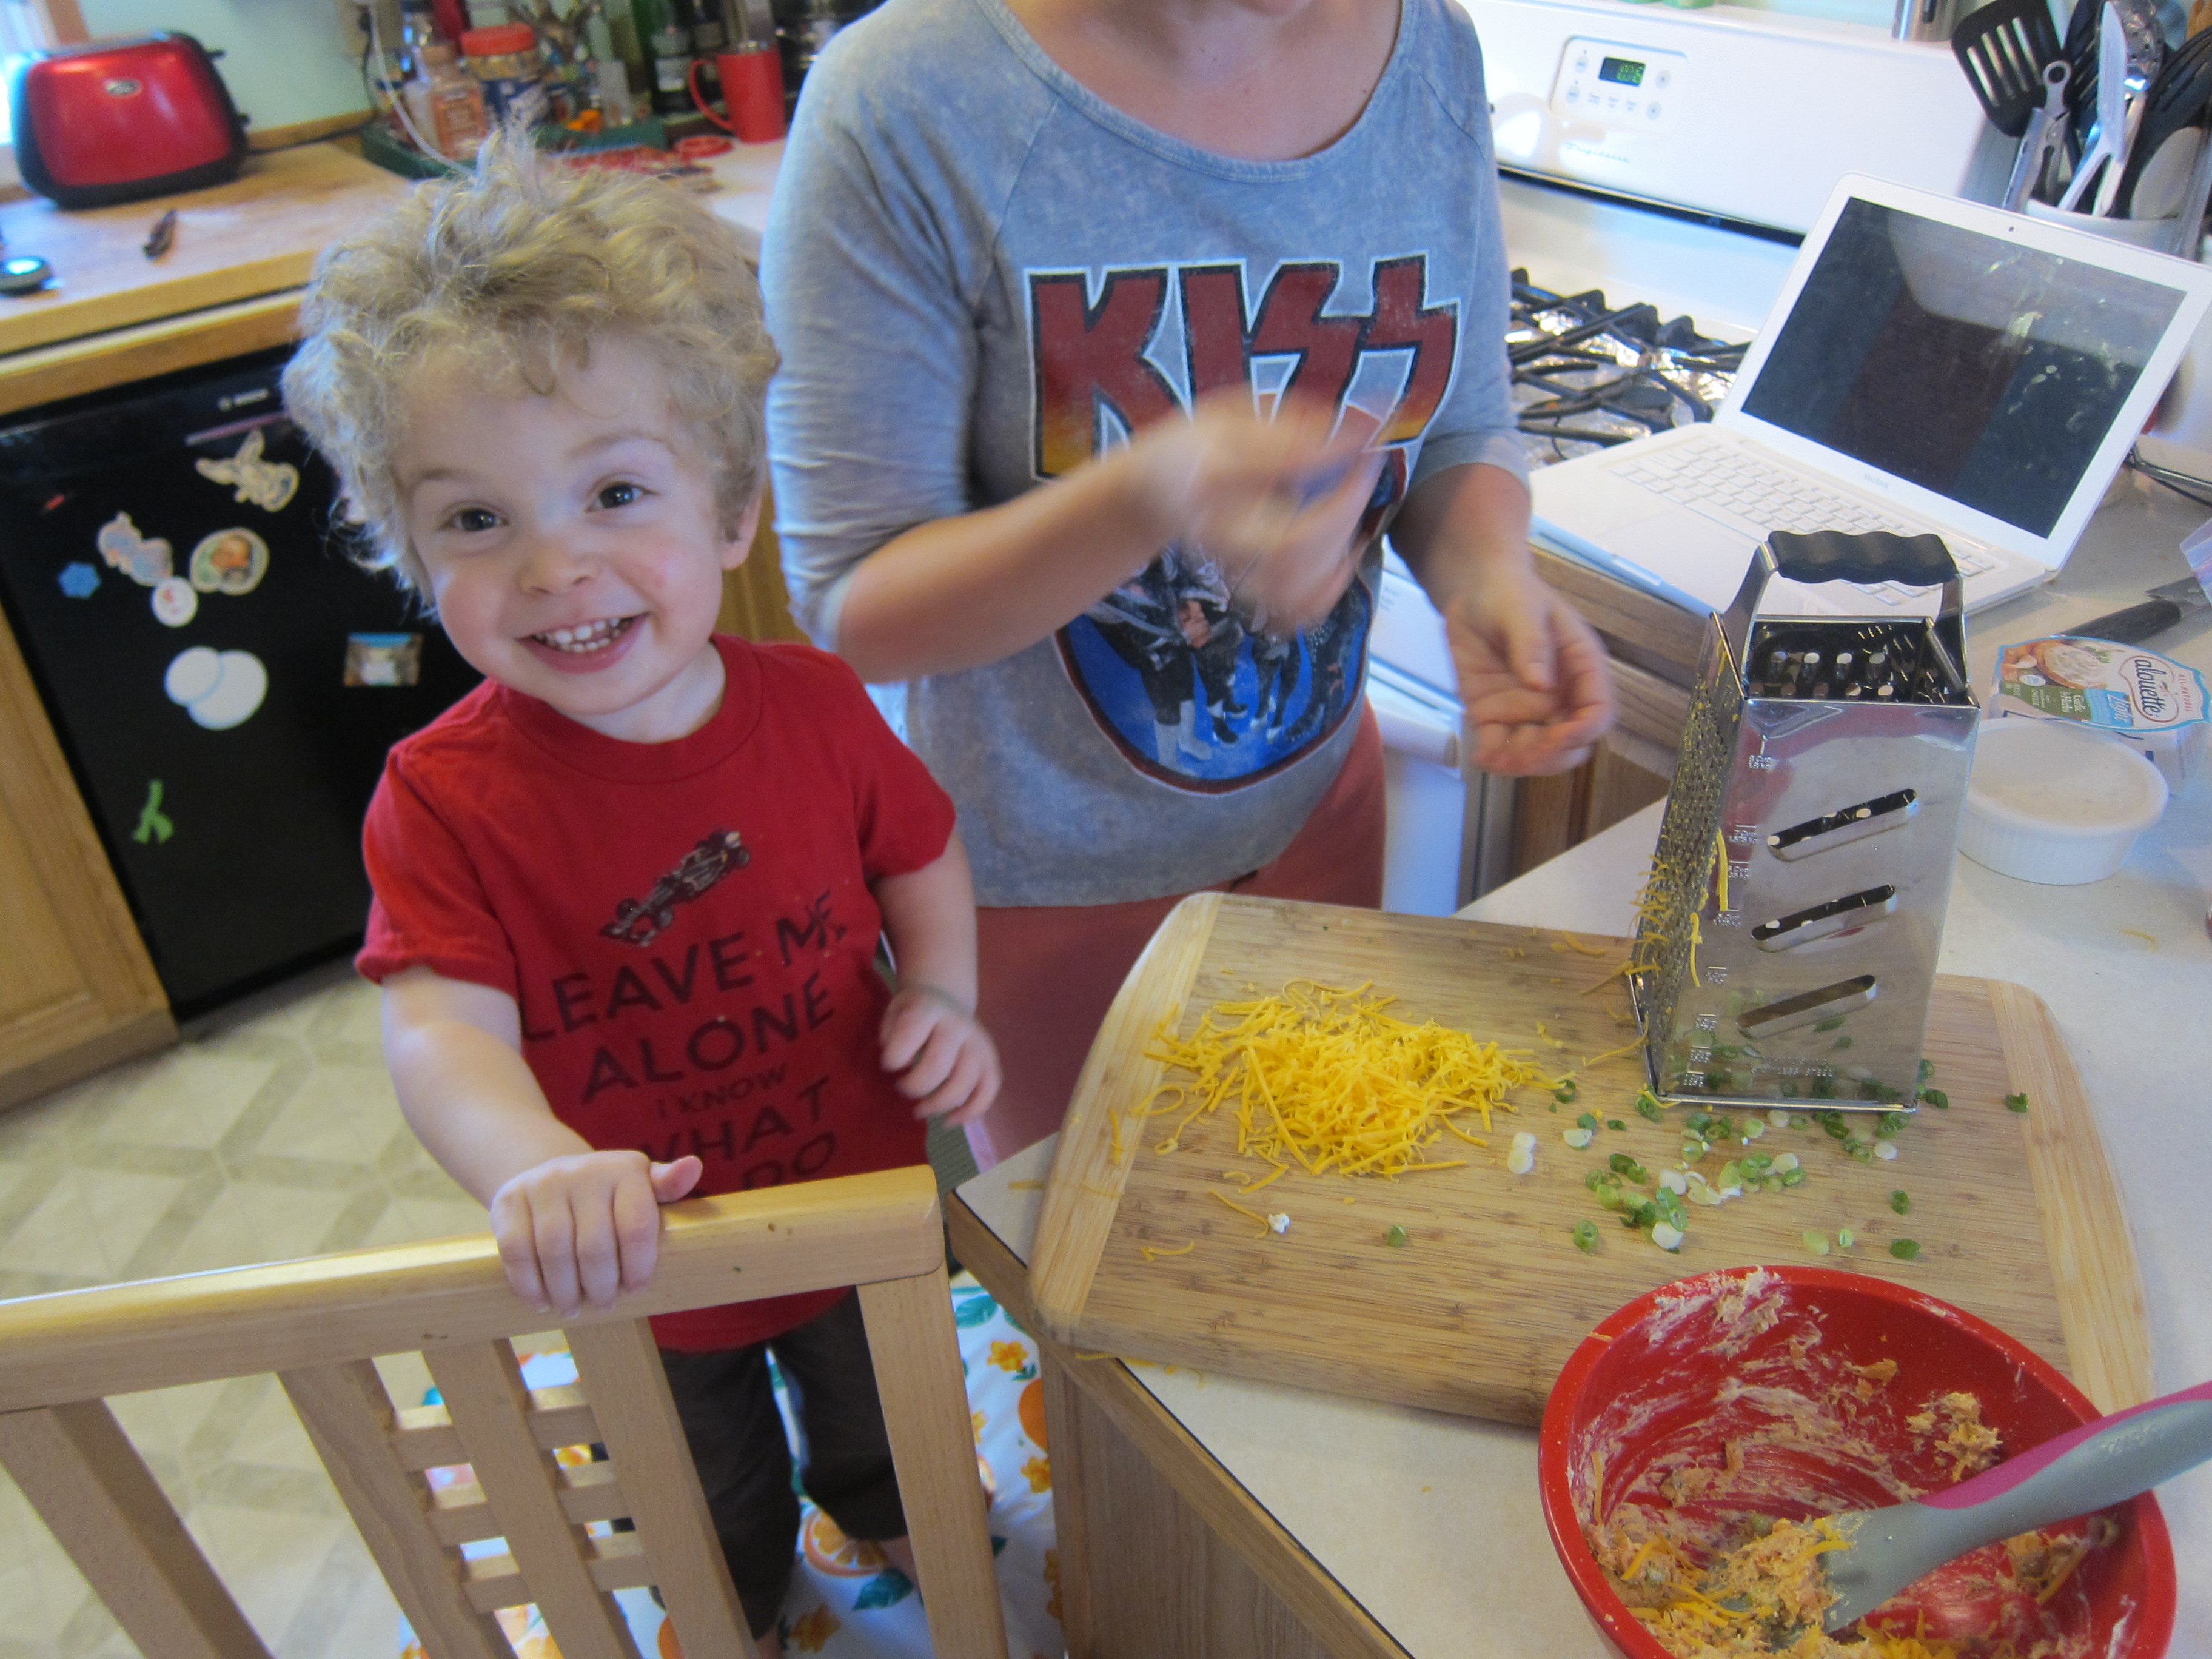
2 tsp. green onion or chive, finely chopped
1/4 cup cheddar cheese, shredded
2 English muffins or slices 0f rustic bread
Directions:
Drain the salmon and break it up with a fork in a mixing bowl. Add the cheese spread, green onions and half the cheese. Add pepper to taste. Mix well. Spread onto the bread and top with more cheddar. Place in the toaster oven or broiler till cheese is all bubbly. Enjoy!
- For more great recipes and e-cookbooks, click here!
1/13/14
Preemie Football Hat -- Free Pattern
My friend Laura asked me to make her new little one a tiny football hat. I was definitely up to the challenge. I was surprised how few knitted patterns there were floating around Pinterest. Most of the patterns are crochet, which can be made very quickly, but for a football hat I think knit has more room for detail.
This hat is so cute and teeny! It's based on a tiny Steelers hat I made Laura's second child a couple of years ago.
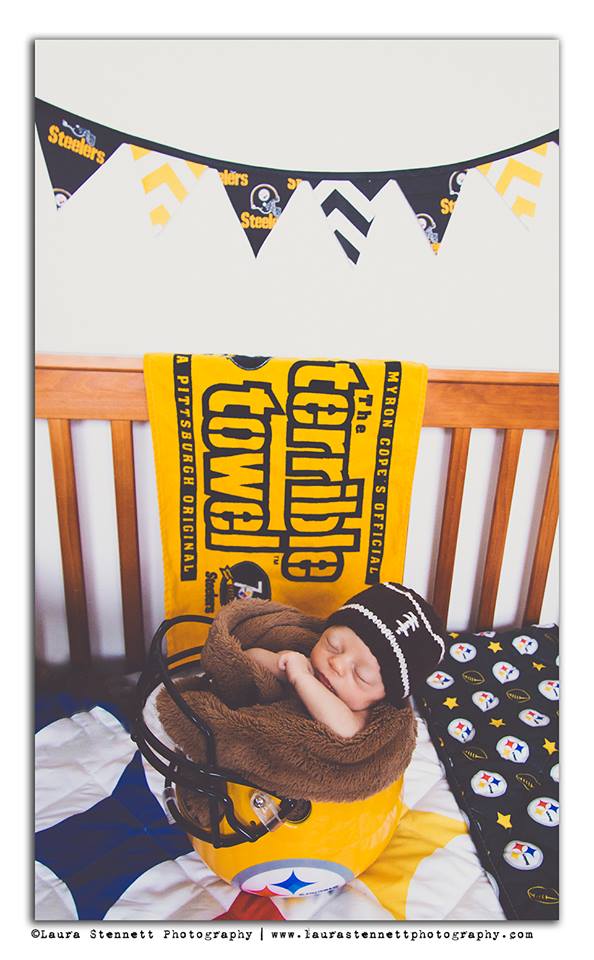
- Photo courtesy of www.laurastennetphotography.com
Materials:
Red Heart Brand worsted yarn in white and brown
size 8 double pointed needles
darning needle
Abbreviations:
k1, p1 = knit one, purl one ribbing
k2tog = knit two stitches together
Directions:
With your double pointed needles, cast on 56 stitches (14 stitches per needle) in brown. Join your work, being sure the stitches aren't twisted and k1, p1 rib for three rounds.
Knit two rounds regularly and switch to the white. No need to cut the brown yarn. Knit two rounds in white and cut leaving an 8-inch tail. Bring up the brown and knit 15 rounds. Knit two rounds white without cutting the brown. Cut the white leaving an 8-inch tail and knit one round in brown. Decrease as follows:
*k2tog, k6* Repeat * till end of round
K one round
*K2tog, k5*, repeat * till end of round
K one round
*K2tog, k4*, repeat * till end of round
K one round
*K2tog, k 3*, repeat * till end of round
K one round
*K2tog, k 2*, repeat * till end of round
K one round
*K2tog, k1*, repeat * till end of round
*K2tog*, repeat * till end of round.
Cut yarn leaving an 8-inch tail. Using a darning needle, weave in all ends.
K one round
*K2tog, k5*, repeat * till end of round
K one round
*K2tog, k4*, repeat * till end of round
K one round
*K2tog, k 3*, repeat * till end of round
K one round
*K2tog, k 2*, repeat * till end of round
K one round
*K2tog, k1*, repeat * till end of round
*K2tog*, repeat * till end of round.
Cut yarn leaving an 8-inch tail. Using a darning needle, weave in all ends.
For the football stitches, thread a darning needle with a 24-inch length of white yarn. On the front of the hat, whipstitch the vertical line using short diagonal stitches stacked on top of one another. Then run three wide stitches perpendicular to the vertical line. Tie off the yarn and weave in the end.
To make this hat for a newborn-3 month size, cast on 64 stitches and follow the same pattern.

12/22/13
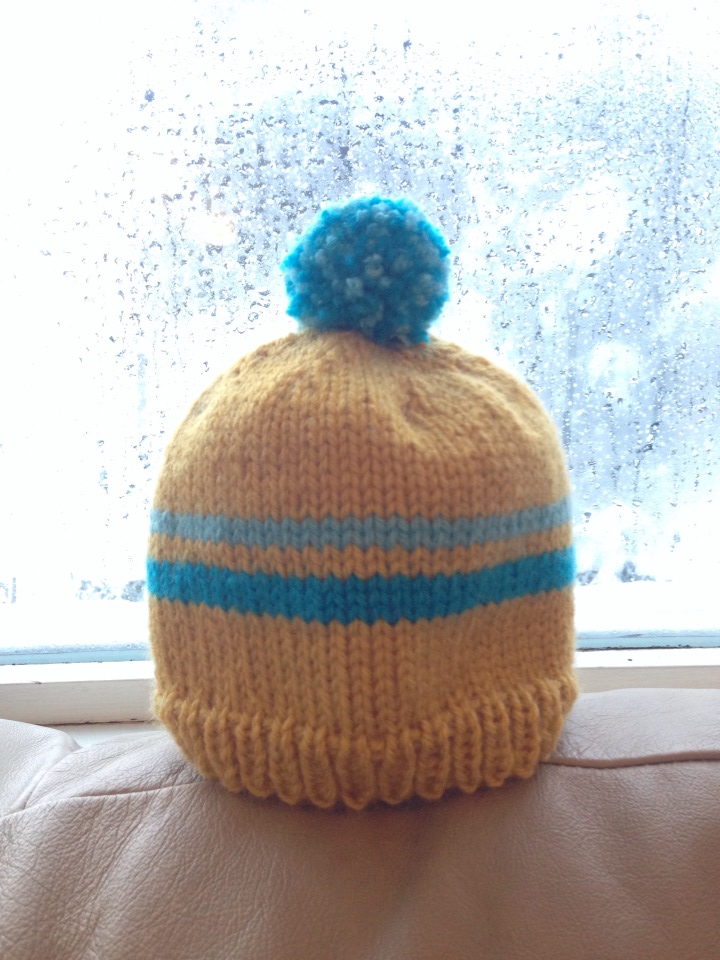
Retro Baby Ski Hat -- Free Pattern
I'm getting down to the knitty gritty here for Christmas presents. I just had one more hat on my list and that was for my best friend's new baby.
I knit this up in just a couple of hours -- and you can too with this simple pattern.
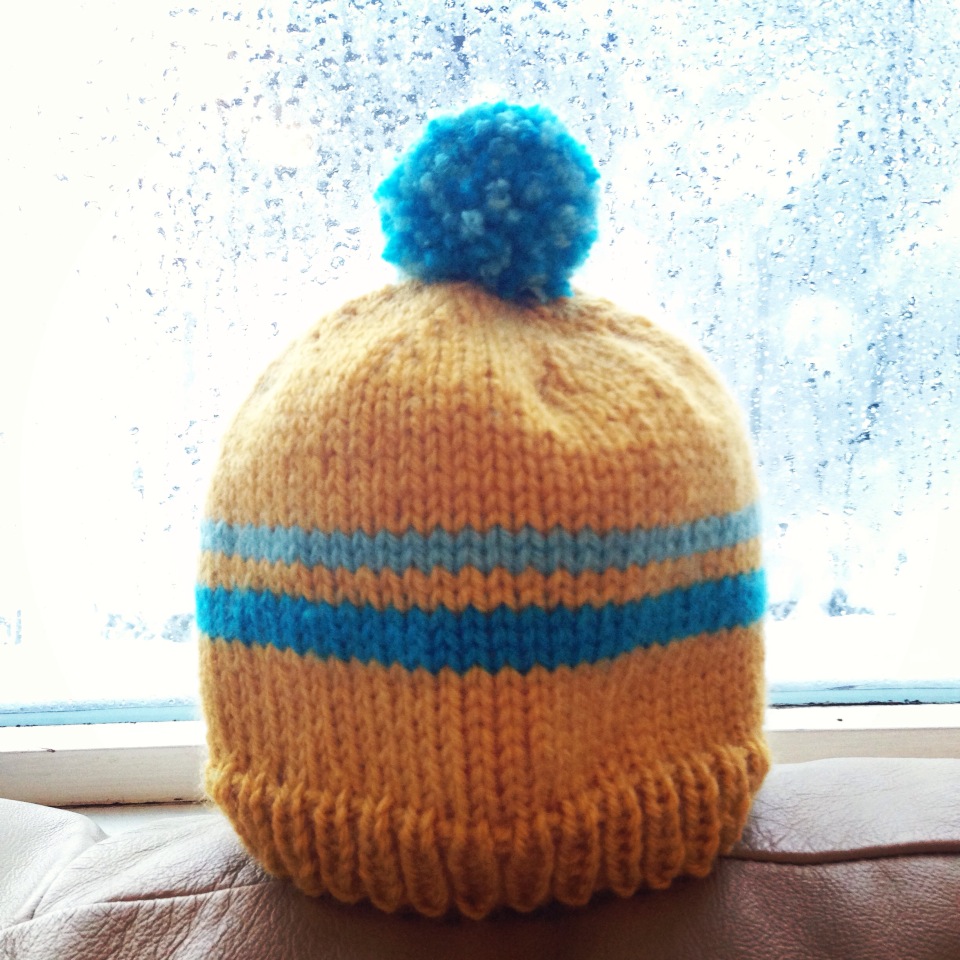
Retro Baby Ski Hat -- for a 3-6 mo. baby
Materials:
Vanna's Choice worsted weight yarn -- mustard, teal and light blue
Size 9 circular needles
size 9 double pointed needles
darning needle
large fork or pom pom maker
Abbreviations:
k1, p1 = knit 1, purl 1 ribbing
k2tog = knit two stitches together
Directions:
With your circular, cast on 64 stitches with mustard color and knit last stitch to first stitch without twisting the stitches. K1, P1 for six rounds. Knit 8 rounds in stockinette stitch.
Switch to teal and knit three rounds. Do not cut mustard yarn.
Cut teal yarn with an 8-inch tail. Switch to mustard yarn and knit two rounds.
Switch to light blue and knit two rounds. Do not cut mustard yarn.
Cut light blue yarn with an 8-inch tail and knit 10 rounds with mustard.
Begin decrease as follows:
Place a marker if you need to, but I can tell where the beginning of the round is based on the stripes.
K2tog, K6, repeat till end of round
Knit one round
K2tog, K5, repeat till end of round
K one round
K2tog, K4, repeat till end
K one round while transferring to double pointed needles. Or knit the round and transfer stitches — whatever’s easier for you.
K2tog, K3, repeat till end
Knit one round
K2tog, K2, repeat till end
Knit one round
K2tog, K1, repeat till end
K2tog, repeat till end.
Cut yarn leaving a long tail. With darning needle, draw up remaining stitches and weave in all ends.
For the pom pom:
Take both the teal and light blue yarn and wrap them around a large serving fork till it's pom pom sized. With a doubled piece of yarn about one foot long, tie the yarn around the middle tine and remove from the fork. Cut the loops and trim pom pom to your liking. Using a darning needle, attach to top of hat. To better secure pom pom, run the yarn back up through the pom pom and back down into the inside of the hat.
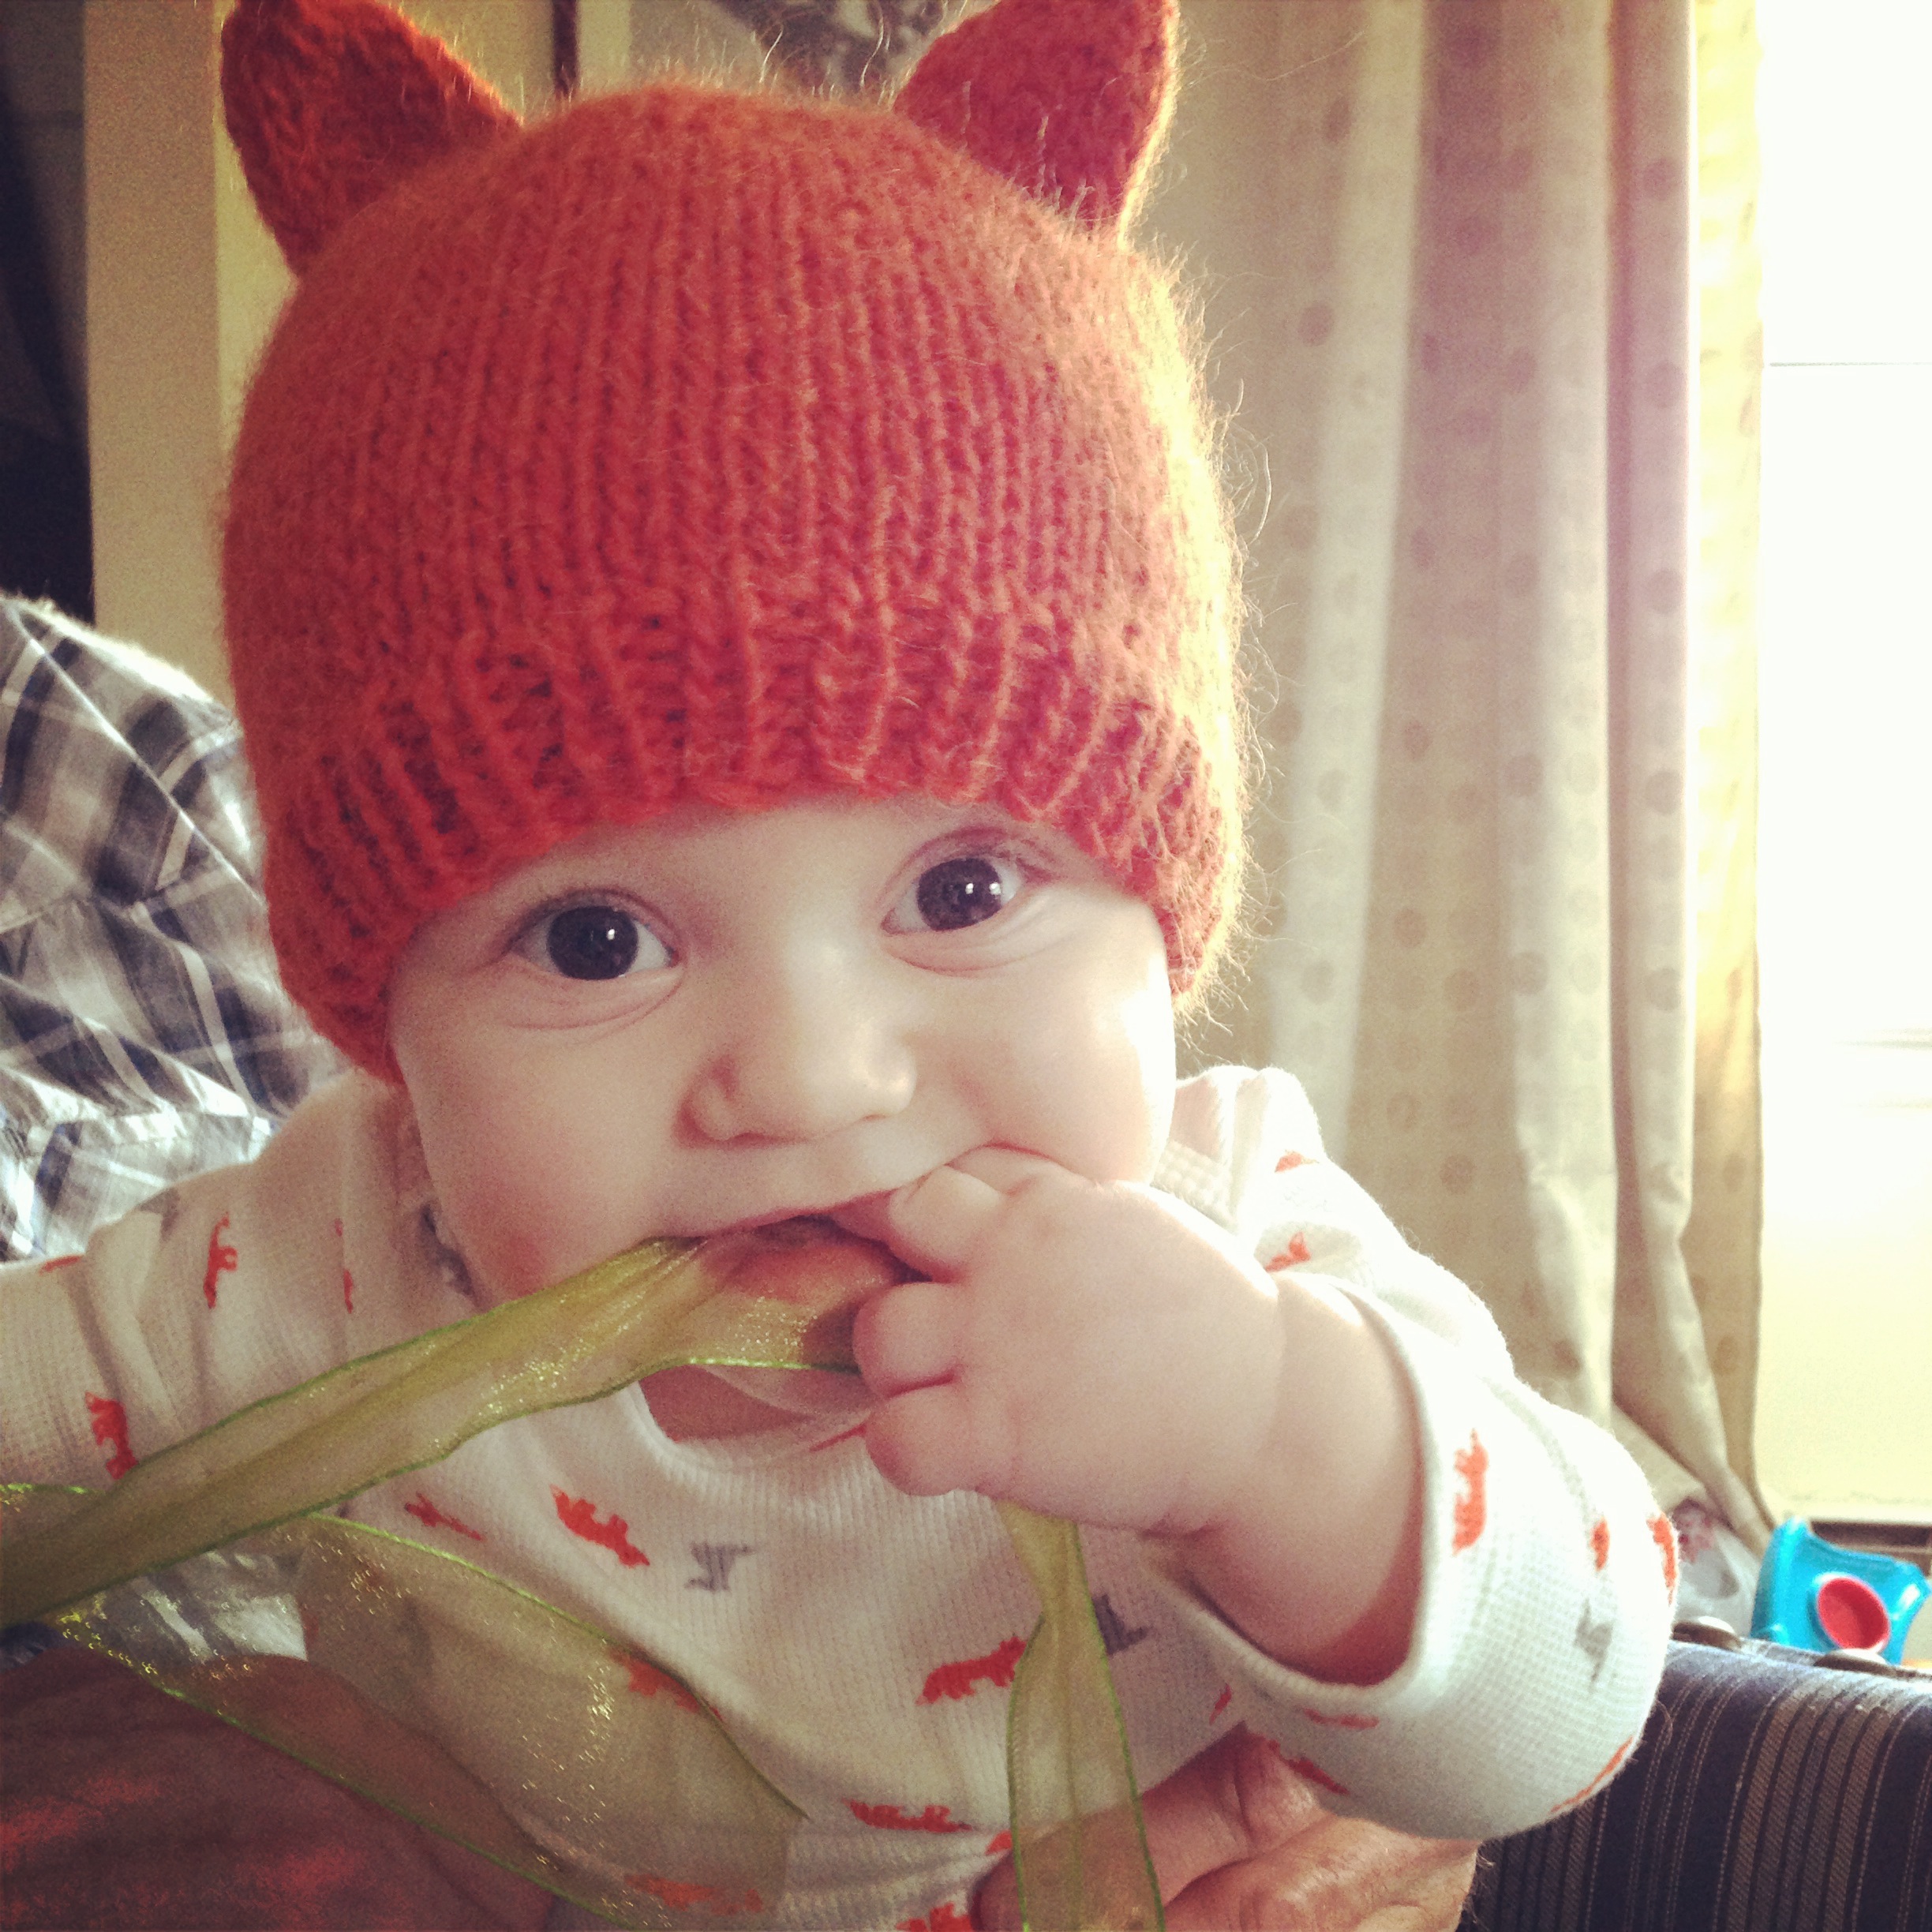
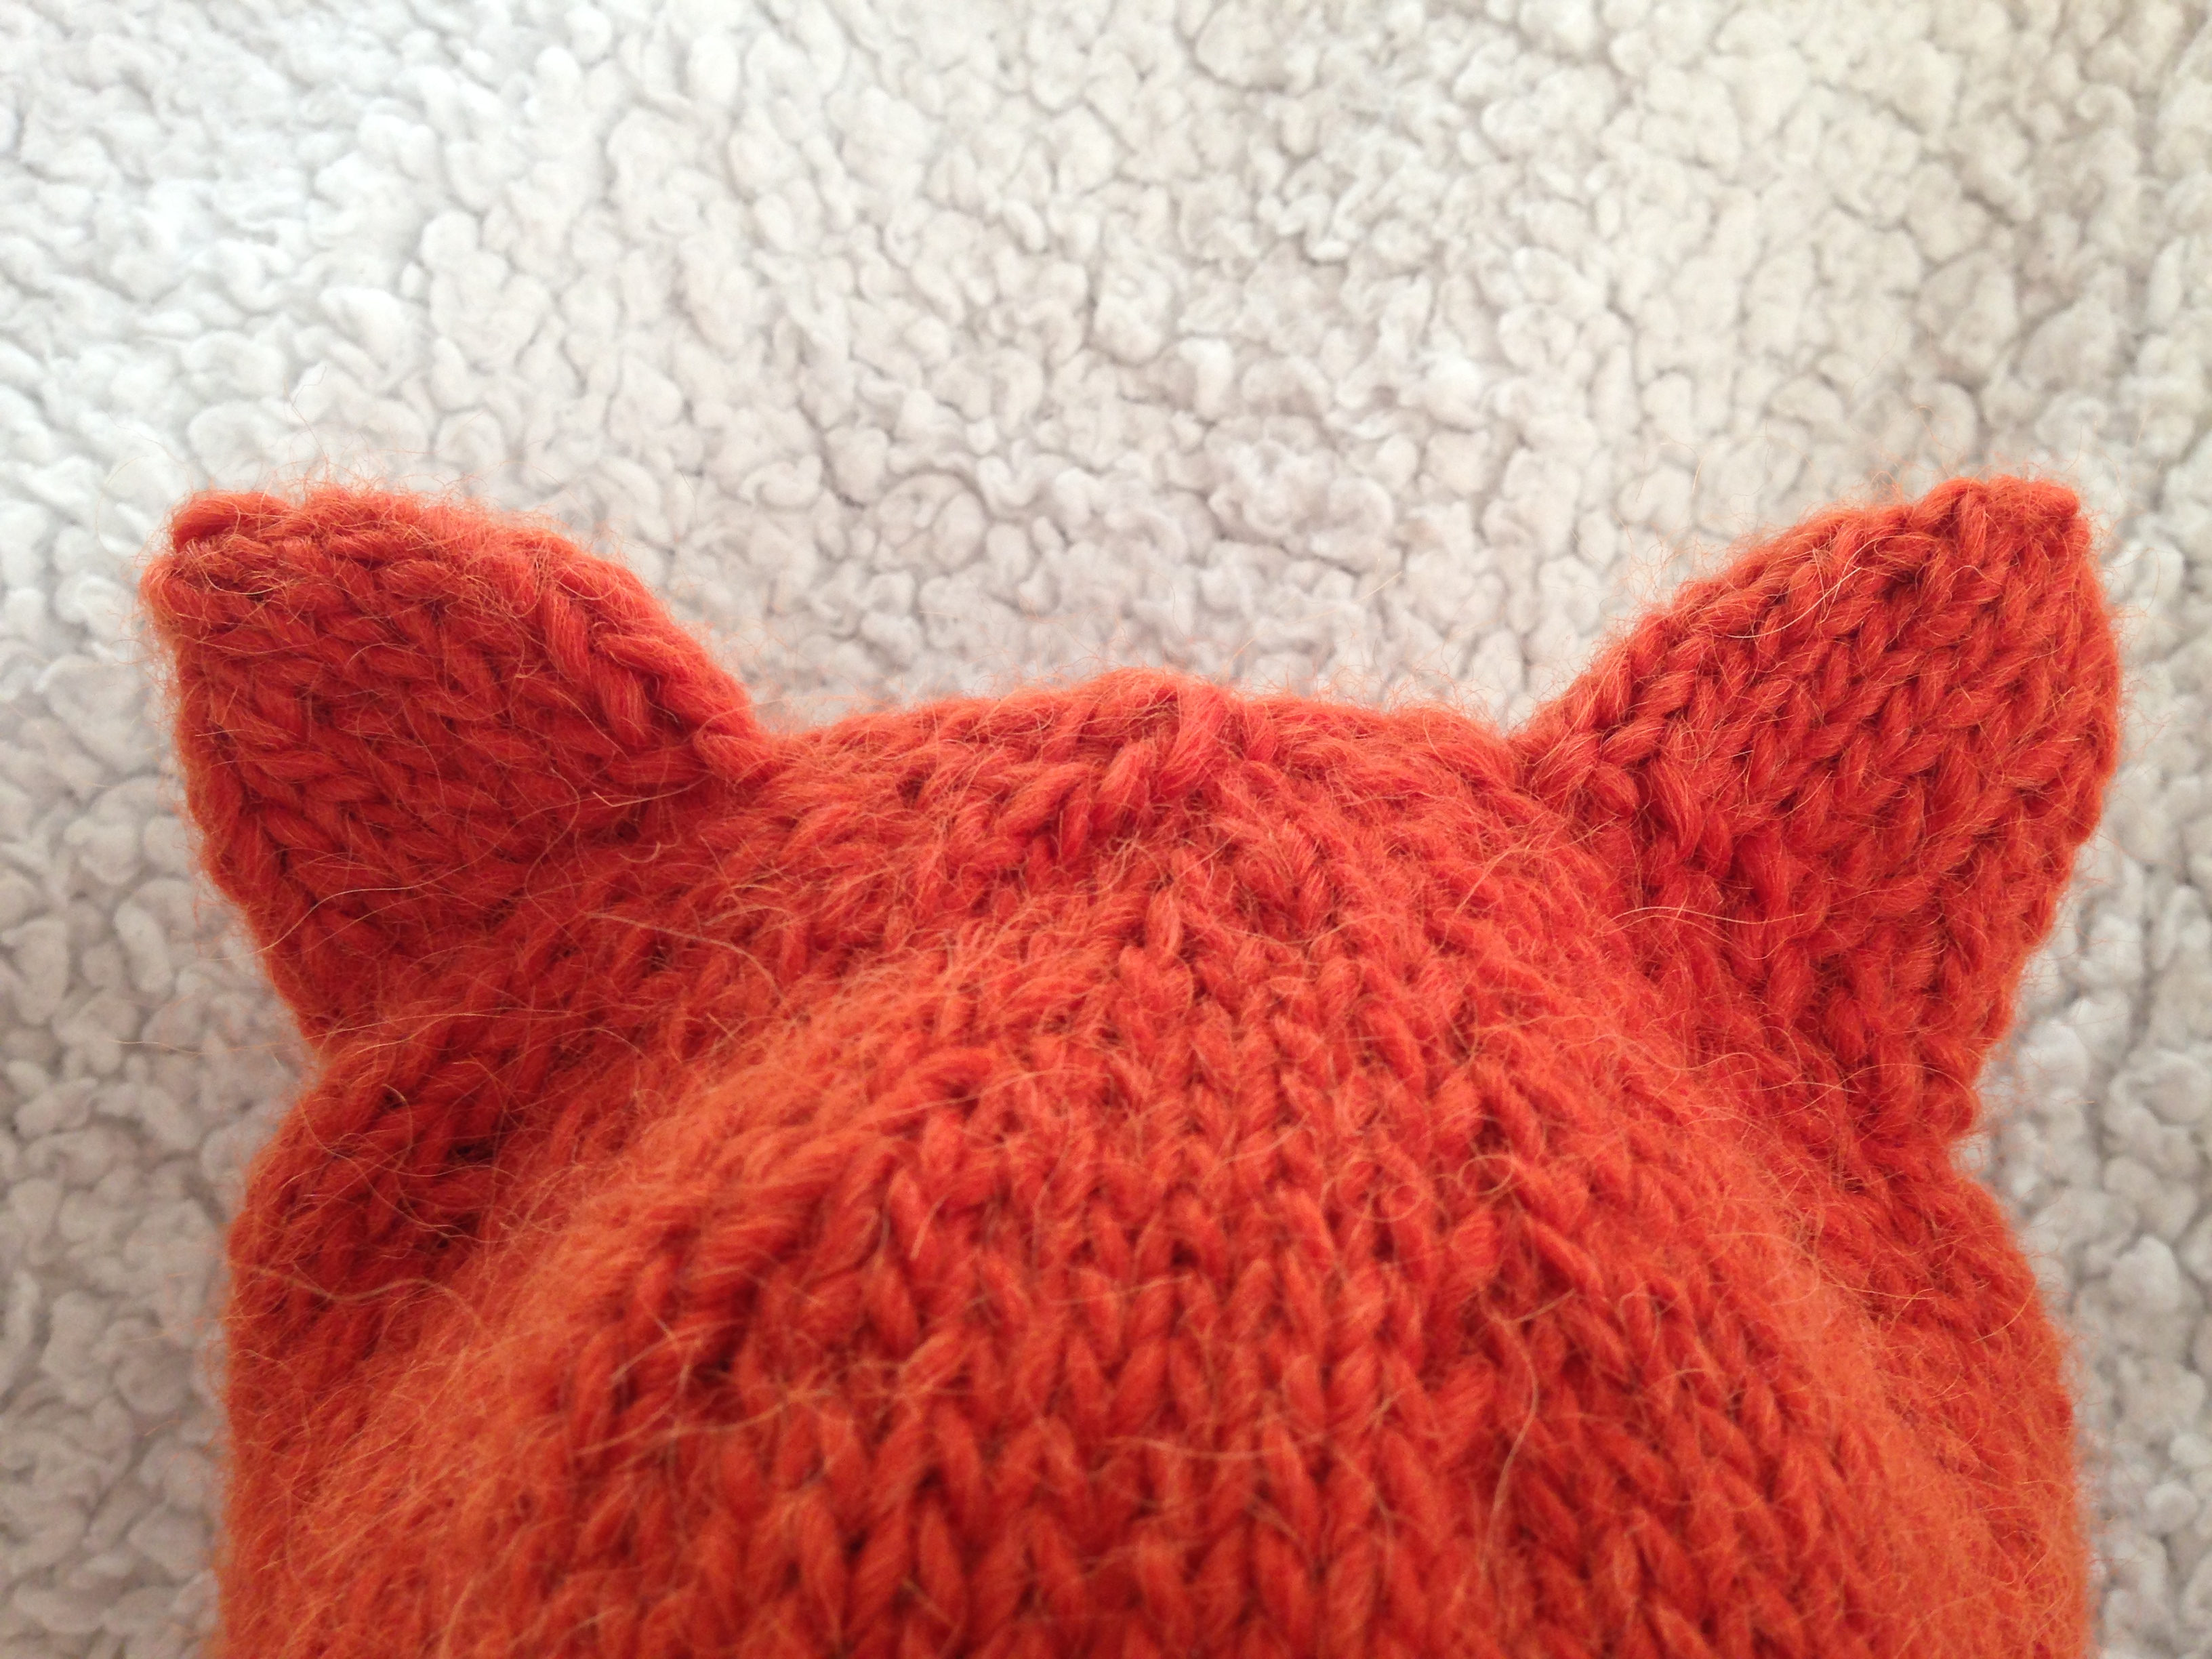
Simple Fox Hat -- Free Pattern
In case you haven't noticed, foxes are really in right now. This season I've already crocheted a nifty fox basket and sewn several felt fox ornaments. I really wanted to make a fox hat for a friend's baby, but I'm pretty terrible at fair isle and halfway through my first attempt, I scratched the whole thing. The snout was all scrunched and I didn't like the look of it.
I decided on something much simpler -- my regular old hat pattern with some ears sewn on top. I winged the ears, but I really like how they turned out. For this project I used some Montera Classic Elite llama/wool chunky yarn I'd been coveting for some time. This hat is fuzzy, warm and downright delightful.
Here's what you need:
1 skein of orange chunky yarn (I used Bolsita Orange from Montera Classic Elite)
size 9, 16-inch circular needle
one set of size 9 double pointed needles
darning needle
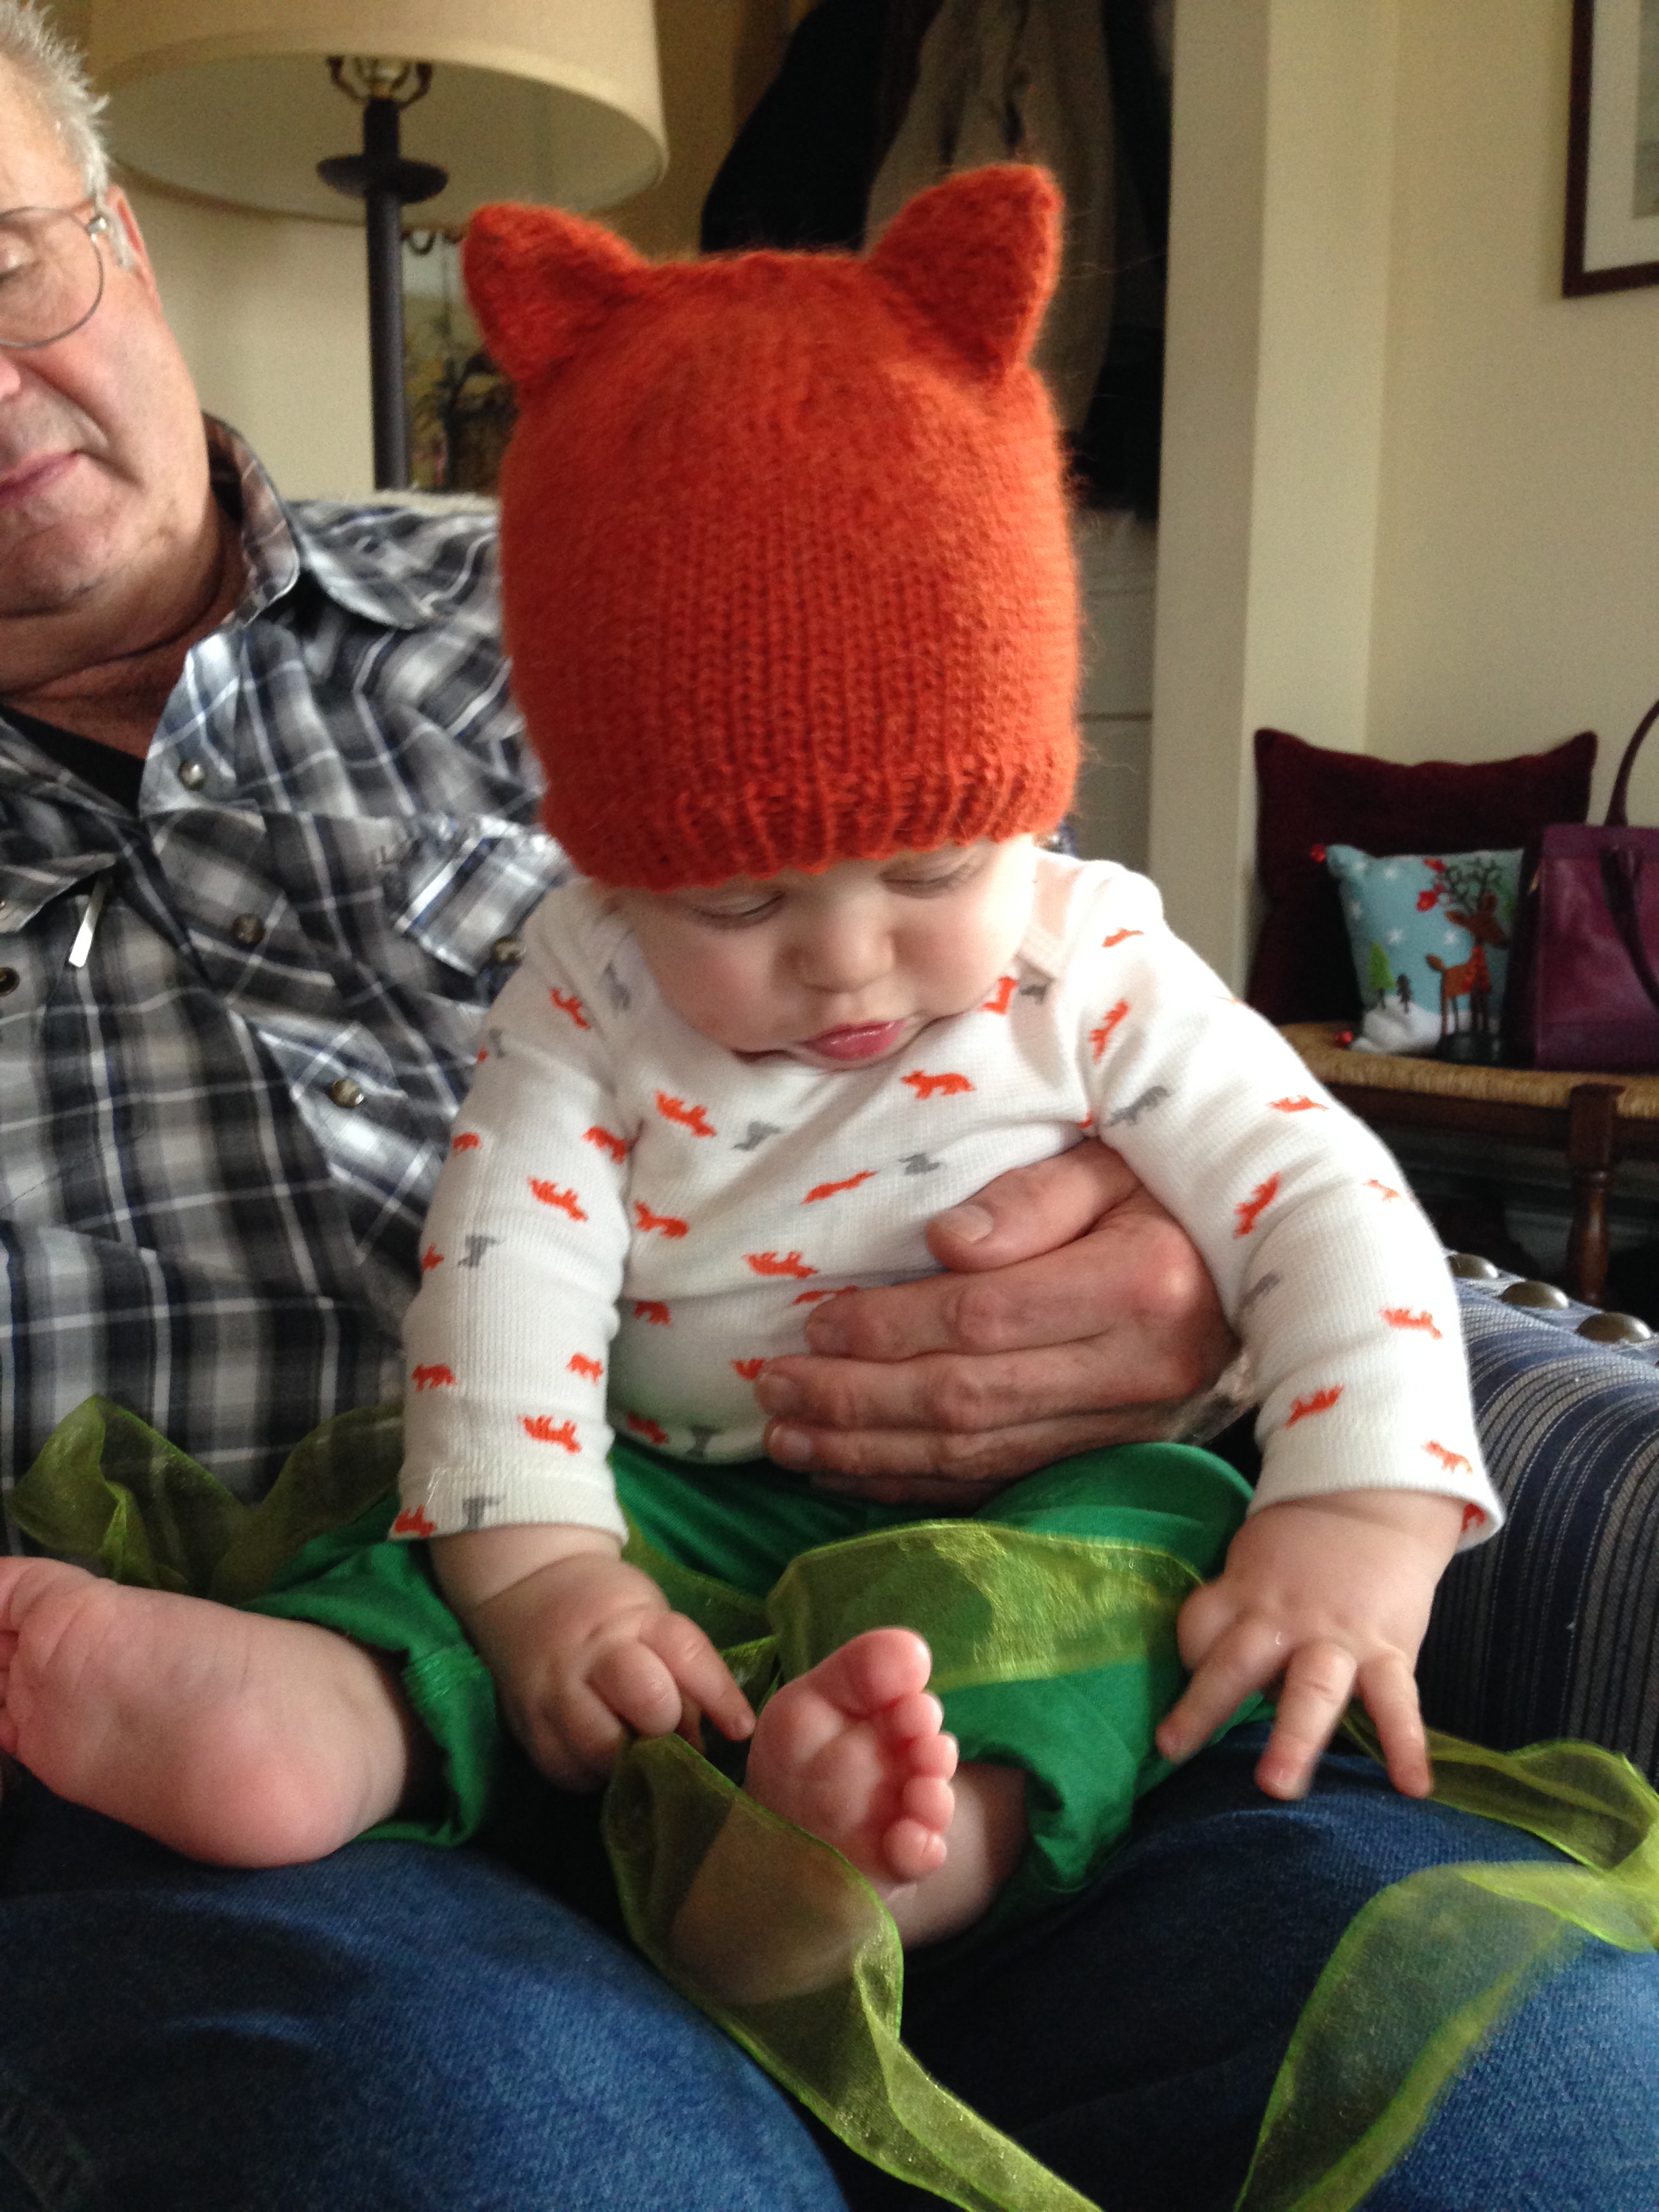
Size: This pattern fits a 12-18-month baby. For a larger hat (2T-3T), cast on 72 stitches and follow the same pattern. For a smaller hat, knit this same pattern on size 8 needles.
Gauge: I do not gauge my work, but according to Montera yarn's website, it should be 3.5-4 sts/inch on size 9 needles.
Abbreviations:
k2tog= knit two stitches together
For the main body of the hat, cast on 64 stitches on the circular needle and knit last stitch to first stitch without twisting the stitches. Knit 1, purl 1 ribbing for five rounds. Knit in stockinette stitch for 22 more rounds, or until piece measures about 5.5 inches.
Decrease as follows:
Place a marker at beginning of round.
K2tog, K6, repeat till end of round
Knit one round
K2tog, K5, repeat till end of round
K one round
K2tog, K4, repeat till end
K one round while transferring to double pointed needles. Or knit the round and transfer stitches — whatever’s easier for you.
K2tog, K3, repeat till end
Knit one round
K2tog, K2, repeat till end
Knit one round
K2tog, K1, repeat till end
K2tog, repeat till end.
Cut yarn leaving a long tail. Run the yarn through the remaining stitches with a darning needle and draw up the hole tight. Weave in ends.
Ear (make 2):
With three double pointed needles, cast on 16 stitches (5, 5, 6), leaving a 12-inch tail. Connect last stitch to first stitch and begin knitting in the round. Knit 3 rounds.
K2tog, k3, K2tog, k3, K2tog, k4
Knit 2 rounds
K2tog, k2, k2tog, k2, k2tog k3
Knit 1 round
K2tog, k1, k2tog, k1, k2tog, k2
Cut yarn leaving a 6-inch tail. Run yarn through the remaining stitches and draw up tight. Weave in the end on the inside of the ear.
With your darning needle and the long cast-on tail, sew the bottom of the ear closed.
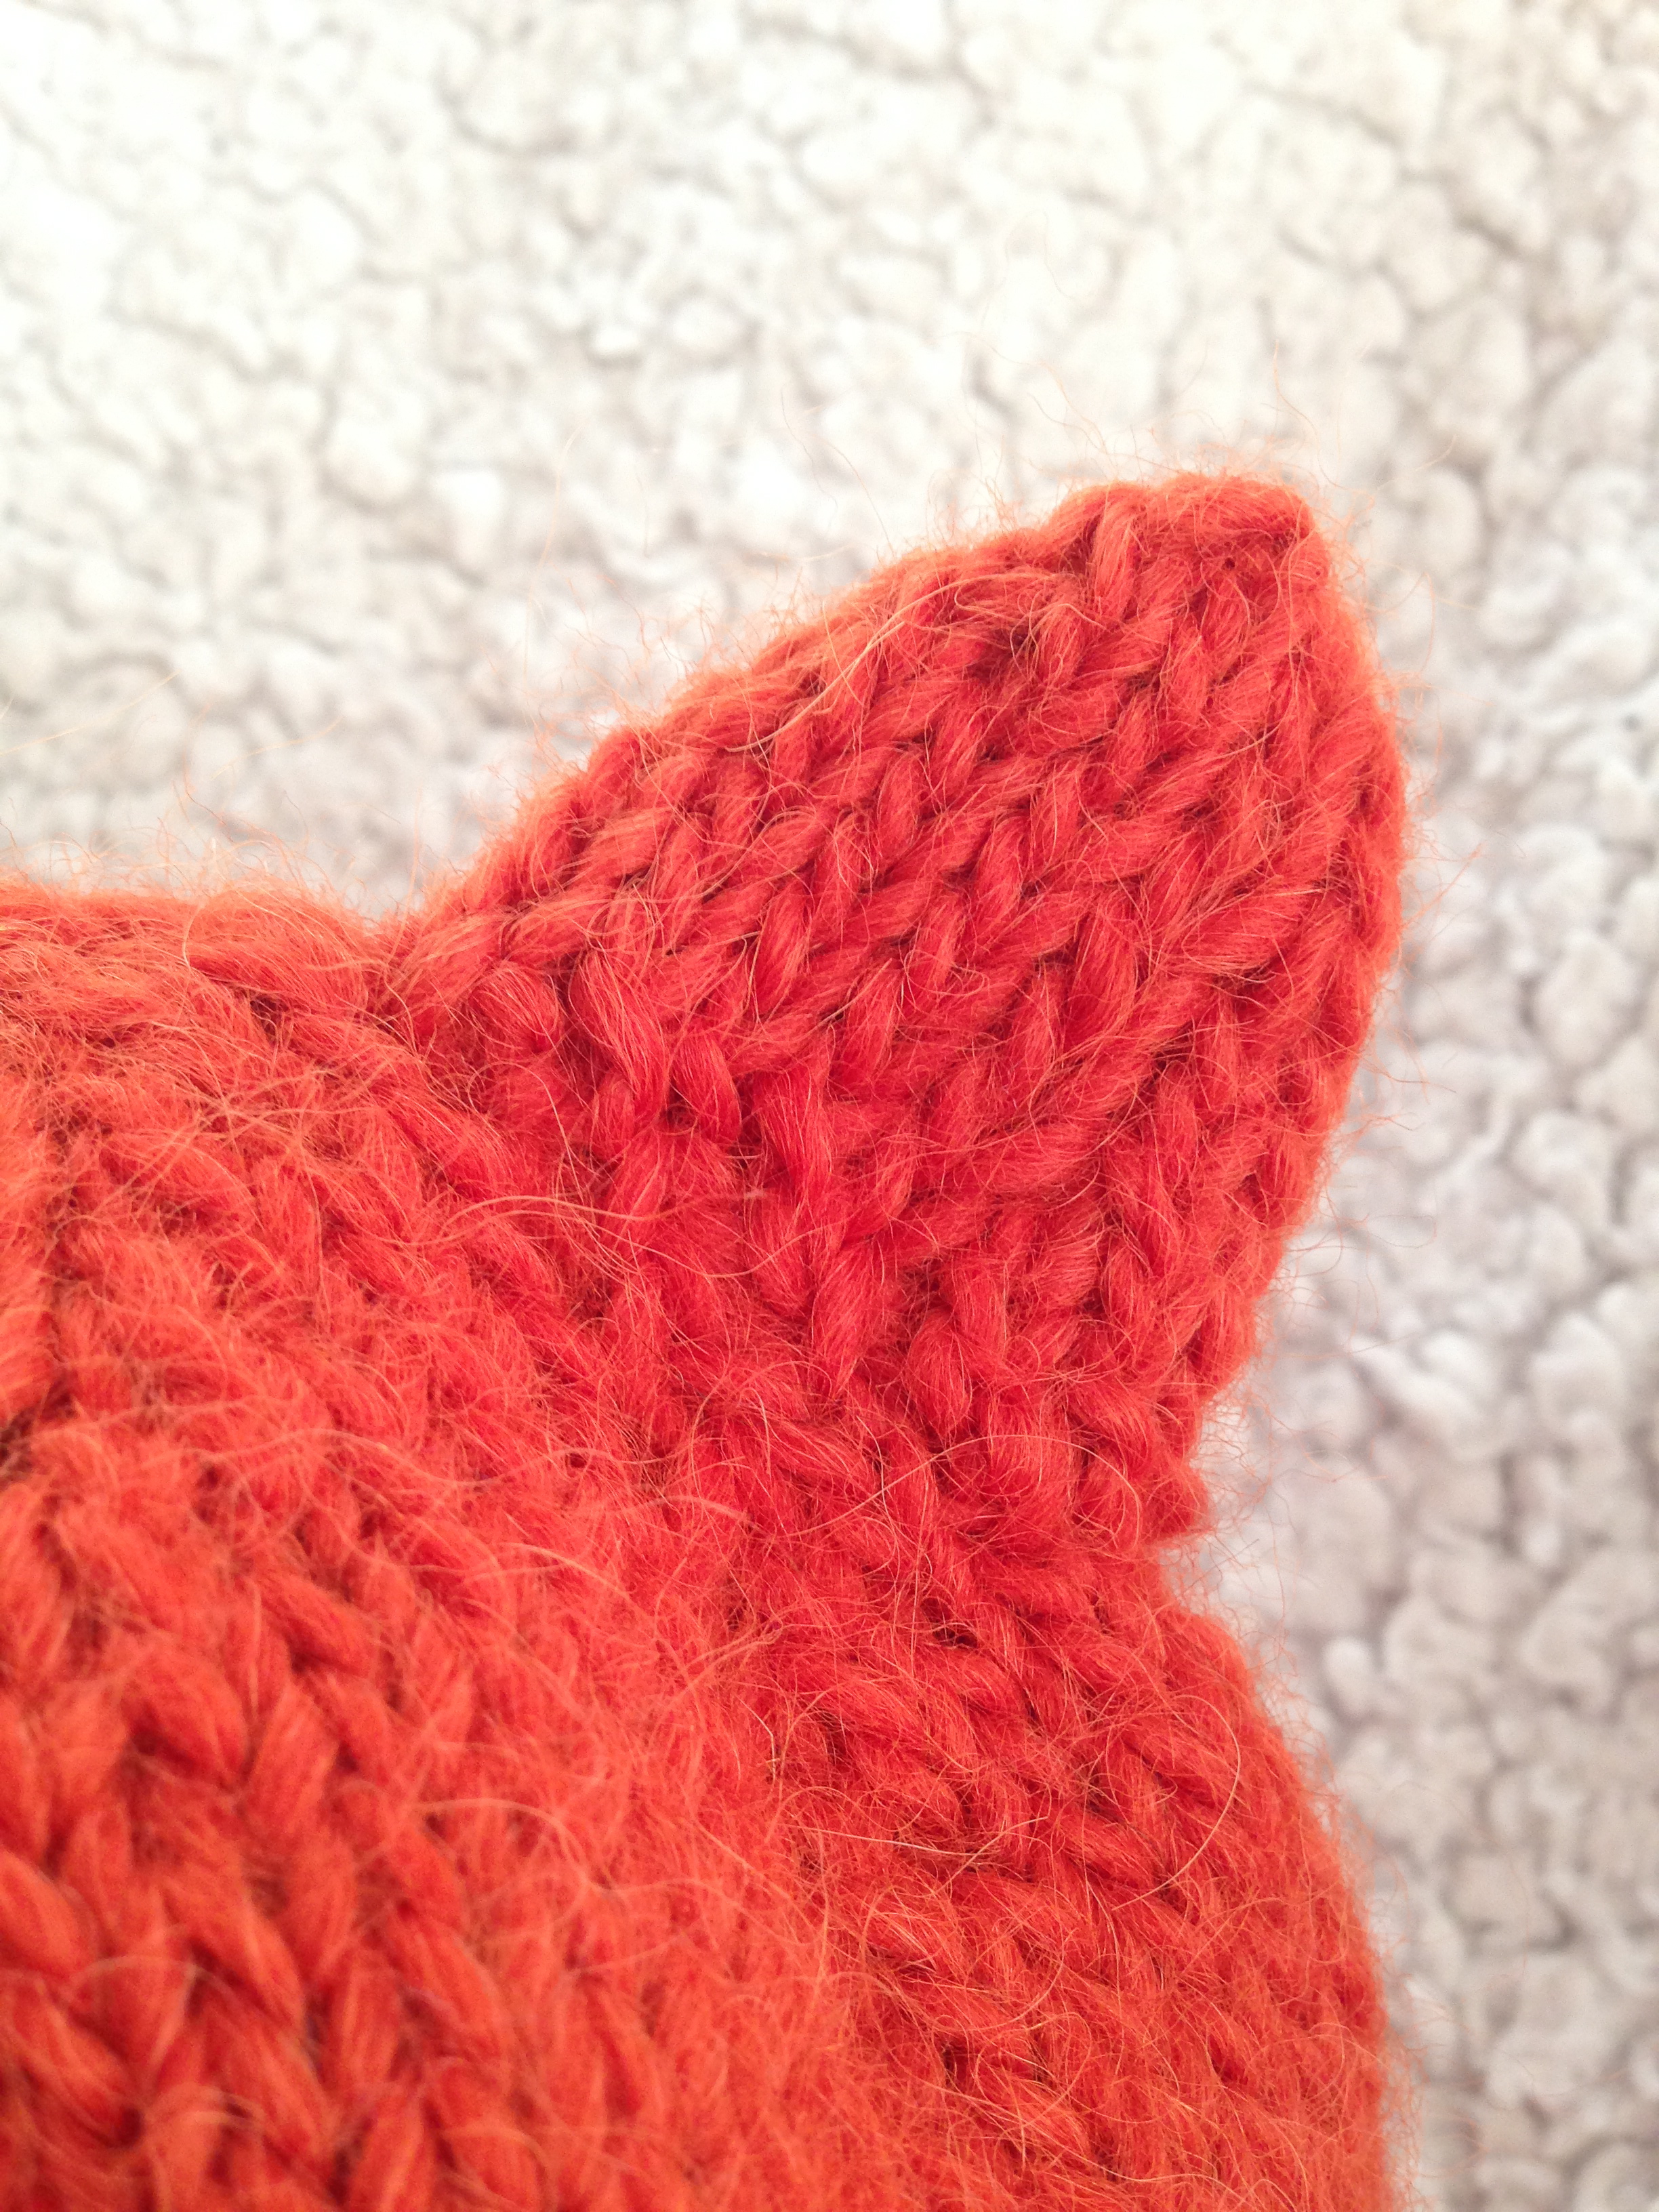
As for sewing on the ears, I folded my hat in half and determined the best placement of the ears. I sewed each ear on with the remaining length of cast-on yarn. I didn't use any special technique for sewing, so I recommend whatever you feel most comfortable with. I actually didn't have enough cast-on yarn so I did some touch ups with extra yarn.
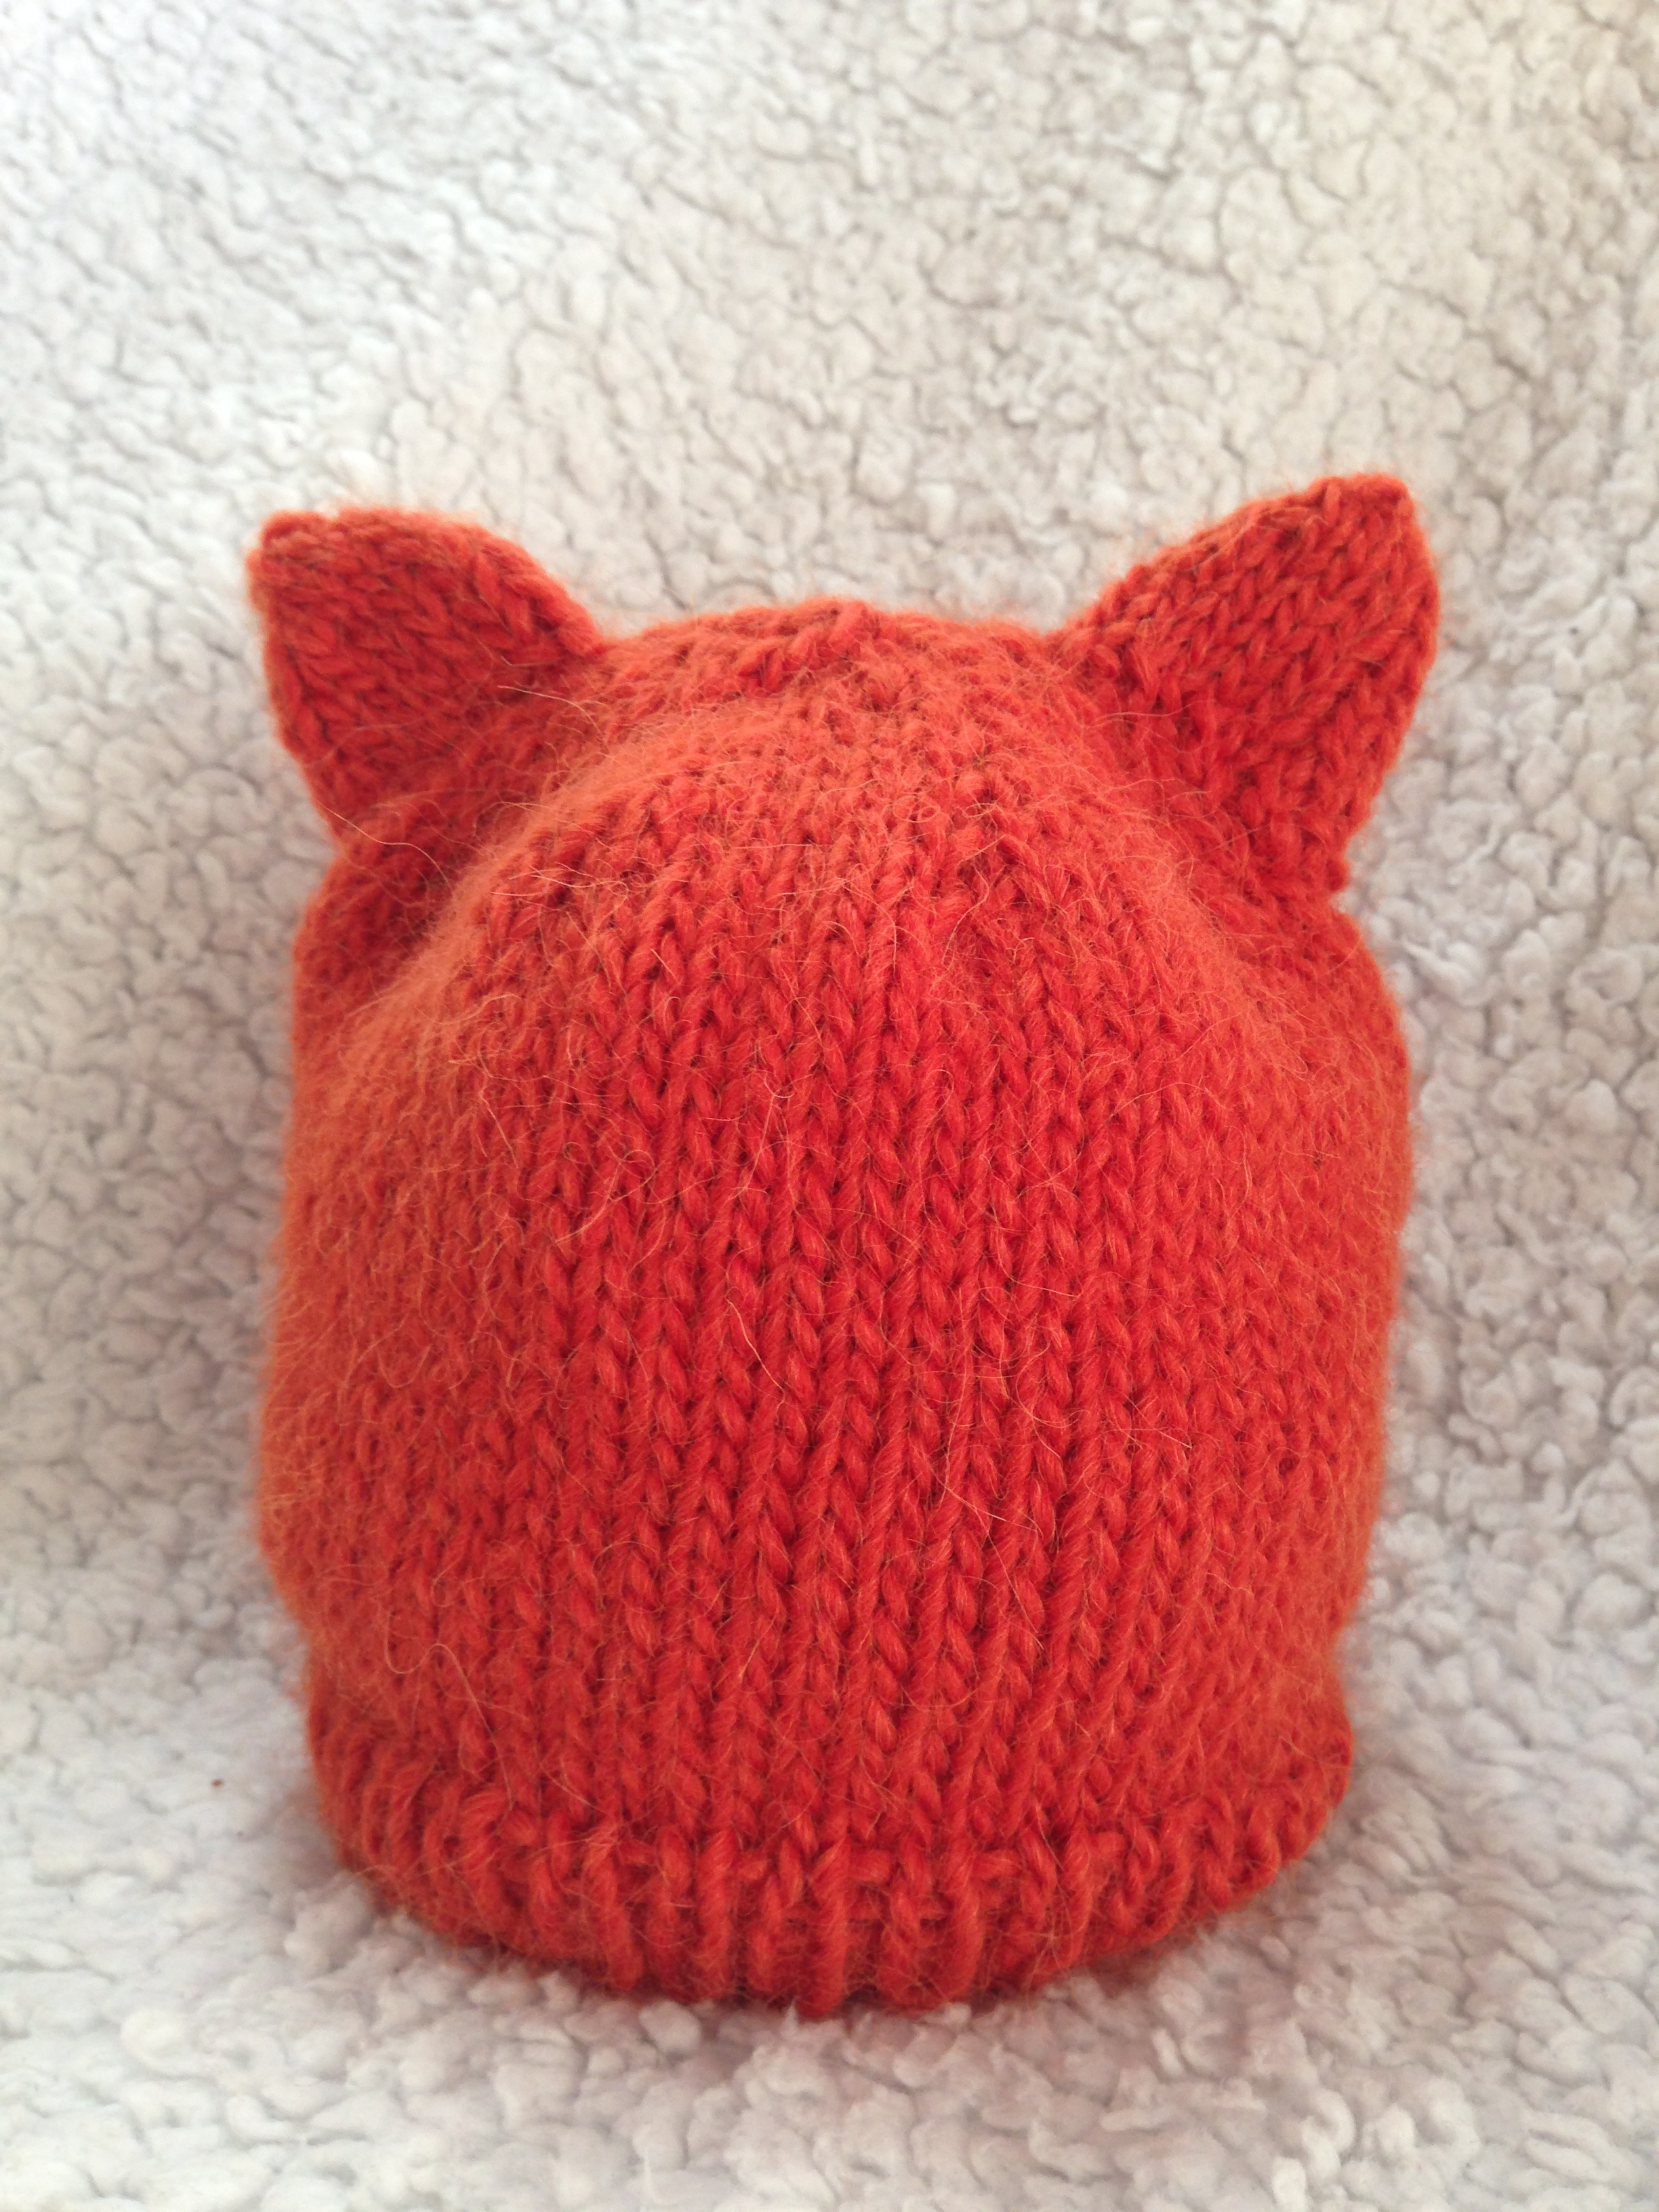
Now it's up to you whether to stitch a little nose and eyes on the front of the hat. I decided not to as I figured the child's face would be the fox's face. Either way would be cute!
11/28/13
The Easy Way to Line a Hat
I could knit hats all day, but ask me to line a hat and chances are I'll never do it. Something about measuring a head, cutting out fabric and sewing it into a hat seems like way too much work.
I was recently deconstructing a cashmere turtleneck for another project and was trying to figure out how to use the turtleneck tube. Headband? Too ugly. Hat lining? Perfect.

Here's how to line a hat with minimal effort. Just some scissors, pinning and whip stitches.
What you'll need:
An old turtleneck
Fabric scissors
A person's head (not yours)
Straight or safety pins
Needle and thread
Directions:
Cut the tube of the neck away from the body of the sweater. I cut below the seam so it wouldn't unravel over time.
Turn the tube inside out and put it on a head with the seam in the back.

Put the hat over the tube and line it up the way you'd like it (if there's a seam to the hat, it should also be in back). Let the hat overhang the tube by 1/4 inch.
Pin the tube to the hat all the way around. This way it will remain stretched out as you sew it and won't cause the hat to pucker.
Remove the tube and hat from the head and thank your head for its assistance.
With thread matching the color of the hat, whip stitch the lining to the inside of the hat, trying to sew into the inside knitted stitches so as not to reveal the thread on the outside of the hat. The following photos are from a different hat and turtleneck.

That's it! Now your hat is warmer and cozier.
I was recently deconstructing a cashmere turtleneck for another project and was trying to figure out how to use the turtleneck tube. Headband? Too ugly. Hat lining? Perfect.

Here's how to line a hat with minimal effort. Just some scissors, pinning and whip stitches.
What you'll need:
An old turtleneck
Fabric scissors
A person's head (not yours)
Straight or safety pins
Needle and thread
Directions:
Cut the tube of the neck away from the body of the sweater. I cut below the seam so it wouldn't unravel over time.
Turn the tube inside out and put it on a head with the seam in the back.

Put the hat over the tube and line it up the way you'd like it (if there's a seam to the hat, it should also be in back). Let the hat overhang the tube by 1/4 inch.
Pin the tube to the hat all the way around. This way it will remain stretched out as you sew it and won't cause the hat to pucker.
Remove the tube and hat from the head and thank your head for its assistance.
With thread matching the color of the hat, whip stitch the lining to the inside of the hat, trying to sew into the inside knitted stitches so as not to reveal the thread on the outside of the hat. The following photos are from a different hat and turtleneck.

 |
| Inside-out view |
That's it! Now your hat is warmer and cozier.
11/27/13
Baby Candy Cane Stocking Cap -- Free Pattern
My photographer friend commissioned me to make a cute stocking cap for her holiday baby photo shoots.
I've never made anything so tall and pointy, but I think the effect is perfect. Could a baby look more like an adorable naked Christmas elf?
This pattern is for a 3-6 month head. It's also a great introduction to knitting stripes.
Ho ho hope you enjoy it!
Baby Candy Cane Stocking Cap
Materials:
One skein of red worsted weight yarn
One skein of cream worsted weight yarn (I used Red Heart soft)
Size 9 circular needles
Set of 9 double-point needles
darning needle
pom pom maker or large fork
Abbreviation: K2tog = knit two stitches together
Directions:
With the red yarn cast on 64 stitches on your circular needle. Join with first stitch being careful not to twist the stitches. Begin ribbing in k1, p1 for six rounds.
Switch to white yarn and knit 2 rounds. There is no need to cut the red yarn as the rows are so narrow you can easily bring up the other yarn when you need it.
Continue knitting in stockinette stitch for 25 more rounds changing colors every 2 rounds. Transfer stitches to double pointed needles and begin decreasing as follows (while continuing to switch colors every 2 rounds):
*K2tog, k6, repeat * till end of round
knit 3 rounds
*K2tog, k5, repeat * till end of round
knit 4 rounds
*K2tog, k4, repeat * till end of round
knit 6 rounds
*K2tog, k3, repeat * till end of round
knit 15 rounds
*K2tog, k2, repeat * till end of round
knit 16 rounds
*K2tog, k1, repeat * till end of round
knit 5 rounds
*K2tog, repeat * till end of round
k 4 rounds. Cut yarn leaving a 12-inch tail. Using a darning needle, draw up remaining stitches and weave in all ends.
Make your pom pom and sew it to the top.

Happy Holidays from Alaska Knit Nat!
I've never made anything so tall and pointy, but I think the effect is perfect. Could a baby look more like an adorable naked Christmas elf?
 |
| Photo by Laura Stennett Photography |
This pattern is for a 3-6 month head. It's also a great introduction to knitting stripes.
Ho ho hope you enjoy it!
Baby Candy Cane Stocking Cap
Materials:
One skein of red worsted weight yarn
One skein of cream worsted weight yarn (I used Red Heart soft)
Size 9 circular needles
Set of 9 double-point needles
darning needle
pom pom maker or large fork
Abbreviation: K2tog = knit two stitches together
Directions:
With the red yarn cast on 64 stitches on your circular needle. Join with first stitch being careful not to twist the stitches. Begin ribbing in k1, p1 for six rounds.
Switch to white yarn and knit 2 rounds. There is no need to cut the red yarn as the rows are so narrow you can easily bring up the other yarn when you need it.
Continue knitting in stockinette stitch for 25 more rounds changing colors every 2 rounds. Transfer stitches to double pointed needles and begin decreasing as follows (while continuing to switch colors every 2 rounds):
*K2tog, k6, repeat * till end of round
knit 3 rounds
*K2tog, k5, repeat * till end of round
knit 4 rounds
*K2tog, k4, repeat * till end of round
knit 6 rounds
*K2tog, k3, repeat * till end of round
knit 15 rounds
*K2tog, k2, repeat * till end of round
knit 16 rounds
*K2tog, k1, repeat * till end of round
knit 5 rounds
*K2tog, repeat * till end of round
k 4 rounds. Cut yarn leaving a 12-inch tail. Using a darning needle, draw up remaining stitches and weave in all ends.
Make your pom pom and sew it to the top.

Happy Holidays from Alaska Knit Nat!
11/26/13
Chicken in a Sherry Mushroom Sauce with Baconated Collard Greens
Being a working mom can often leave me beat at the end of the day. I always try and throw something together, but once in a while it's nice to make something fancy.

The dish I made tonight was again inspired by an NPR show. Today on Fresh Air the chefs from America's Test Kitchen were talking turkey and mentioned a collard greens side dish that sounded pretty tasty. I wasn't able to find the recipe on Fresh Air's website, so I winged it.
I'm not too familiar with cooking collards, but what I came up with was bright, slightly smoky and delicious.
The chicken, coincidentally enough, was inspired by an America's Test Kitchen recipe for chicken piccata. This was healthy meal and was enjoyed by all (even our son liked the collards!)
Serves 3, prep/cooking time: 45 mins.
Ingredients for the chicken:
2 boneless, skinless chicken breasts
Olive oil
2 tsp. soy sauce
3 Tbs. apple cider vinegar
5 cloves garlic, chopped
1 tsp. Dijon mustard
salt and pepper
flour
butter
1/2 medium onion, finely chopped
2 cups chopped fresh mushrooms (such as button, crimini and baby portobello)
1/4 cup sherry or white wine
3/4 cup chicken stock
2 Tbs. fresh parsley, chopped
1 tbs. capers (optional)
squeeze of lemon
Ingredients for the collards:
1 bunch collard greens
3 slices bacon, chopped
1/2 medium onion, finely chopped
1 cup chicken stock
2 tsp. apple cider vinegar
salt and pepper
Directions:
With a fork, stab the chicken all over. Place in a large Ziploc bag with 3 Tbs. olive oil, the soy sauce, vinegar, mustard, 3 cloves of garlic, salt and pepper. Marinate chicken in the fridge for 30 minutes.
Meanwhile, rinse the collards and remove the stalks. Roughly chop the collards. In a dutch oven, brown the bacon and set aside. Add 1 Tbs. olive oil and sauté the onions till soft, about 5 minutes. Add the collards and stir till they are wilted, about 3 minutes. Add the chicken stock, cover and let steam for 30 minutes, adding more stock if needed. There should be very little liquid in the pot toward the end, so partially cover and let liquid evaporate if needs be.
While the collards cook, pat dry the chicken and dredge in flour.
Preheat the oven to 400 degrees. Heat a large oven-safe skillet over medium-high heat. Add 1 Tbs. butter and 1 Tbs. olive oil. When pan is hot, add the chicken and brown on both sides, about 5 minutes per side. Set chicken aside.
Add the mushrooms and onions and sauté till onions are soft. Add 2 cloves of garlic and cook for one minute. Stir in 2 Tbs. flour and cook for another minute. Pour in the sherry and stock and bring to a simmer, scraping up all the yummy burnt bits from the bottom of the pan.
When the sauce has thickened, place the chicken back in the pan. Cover the pan and place it in the oven. Bake for 20 minutes or until chicken is cooked through.
Set the chicken on your serving plates and add parsley and capers to the sauce in the pan. Stir and spoon over the chicken. Add a fresh squeeze of lemon juice to each plate.
To finish the collards, stir in the bacon bits and vinegar. Add salt and vinegar to taste.
Serve with brown rice or farro.

Subscribe to:
Posts (Atom)