Showing posts with label baby. Show all posts

1/13/14

Preemie Football Hat -- Free Pattern

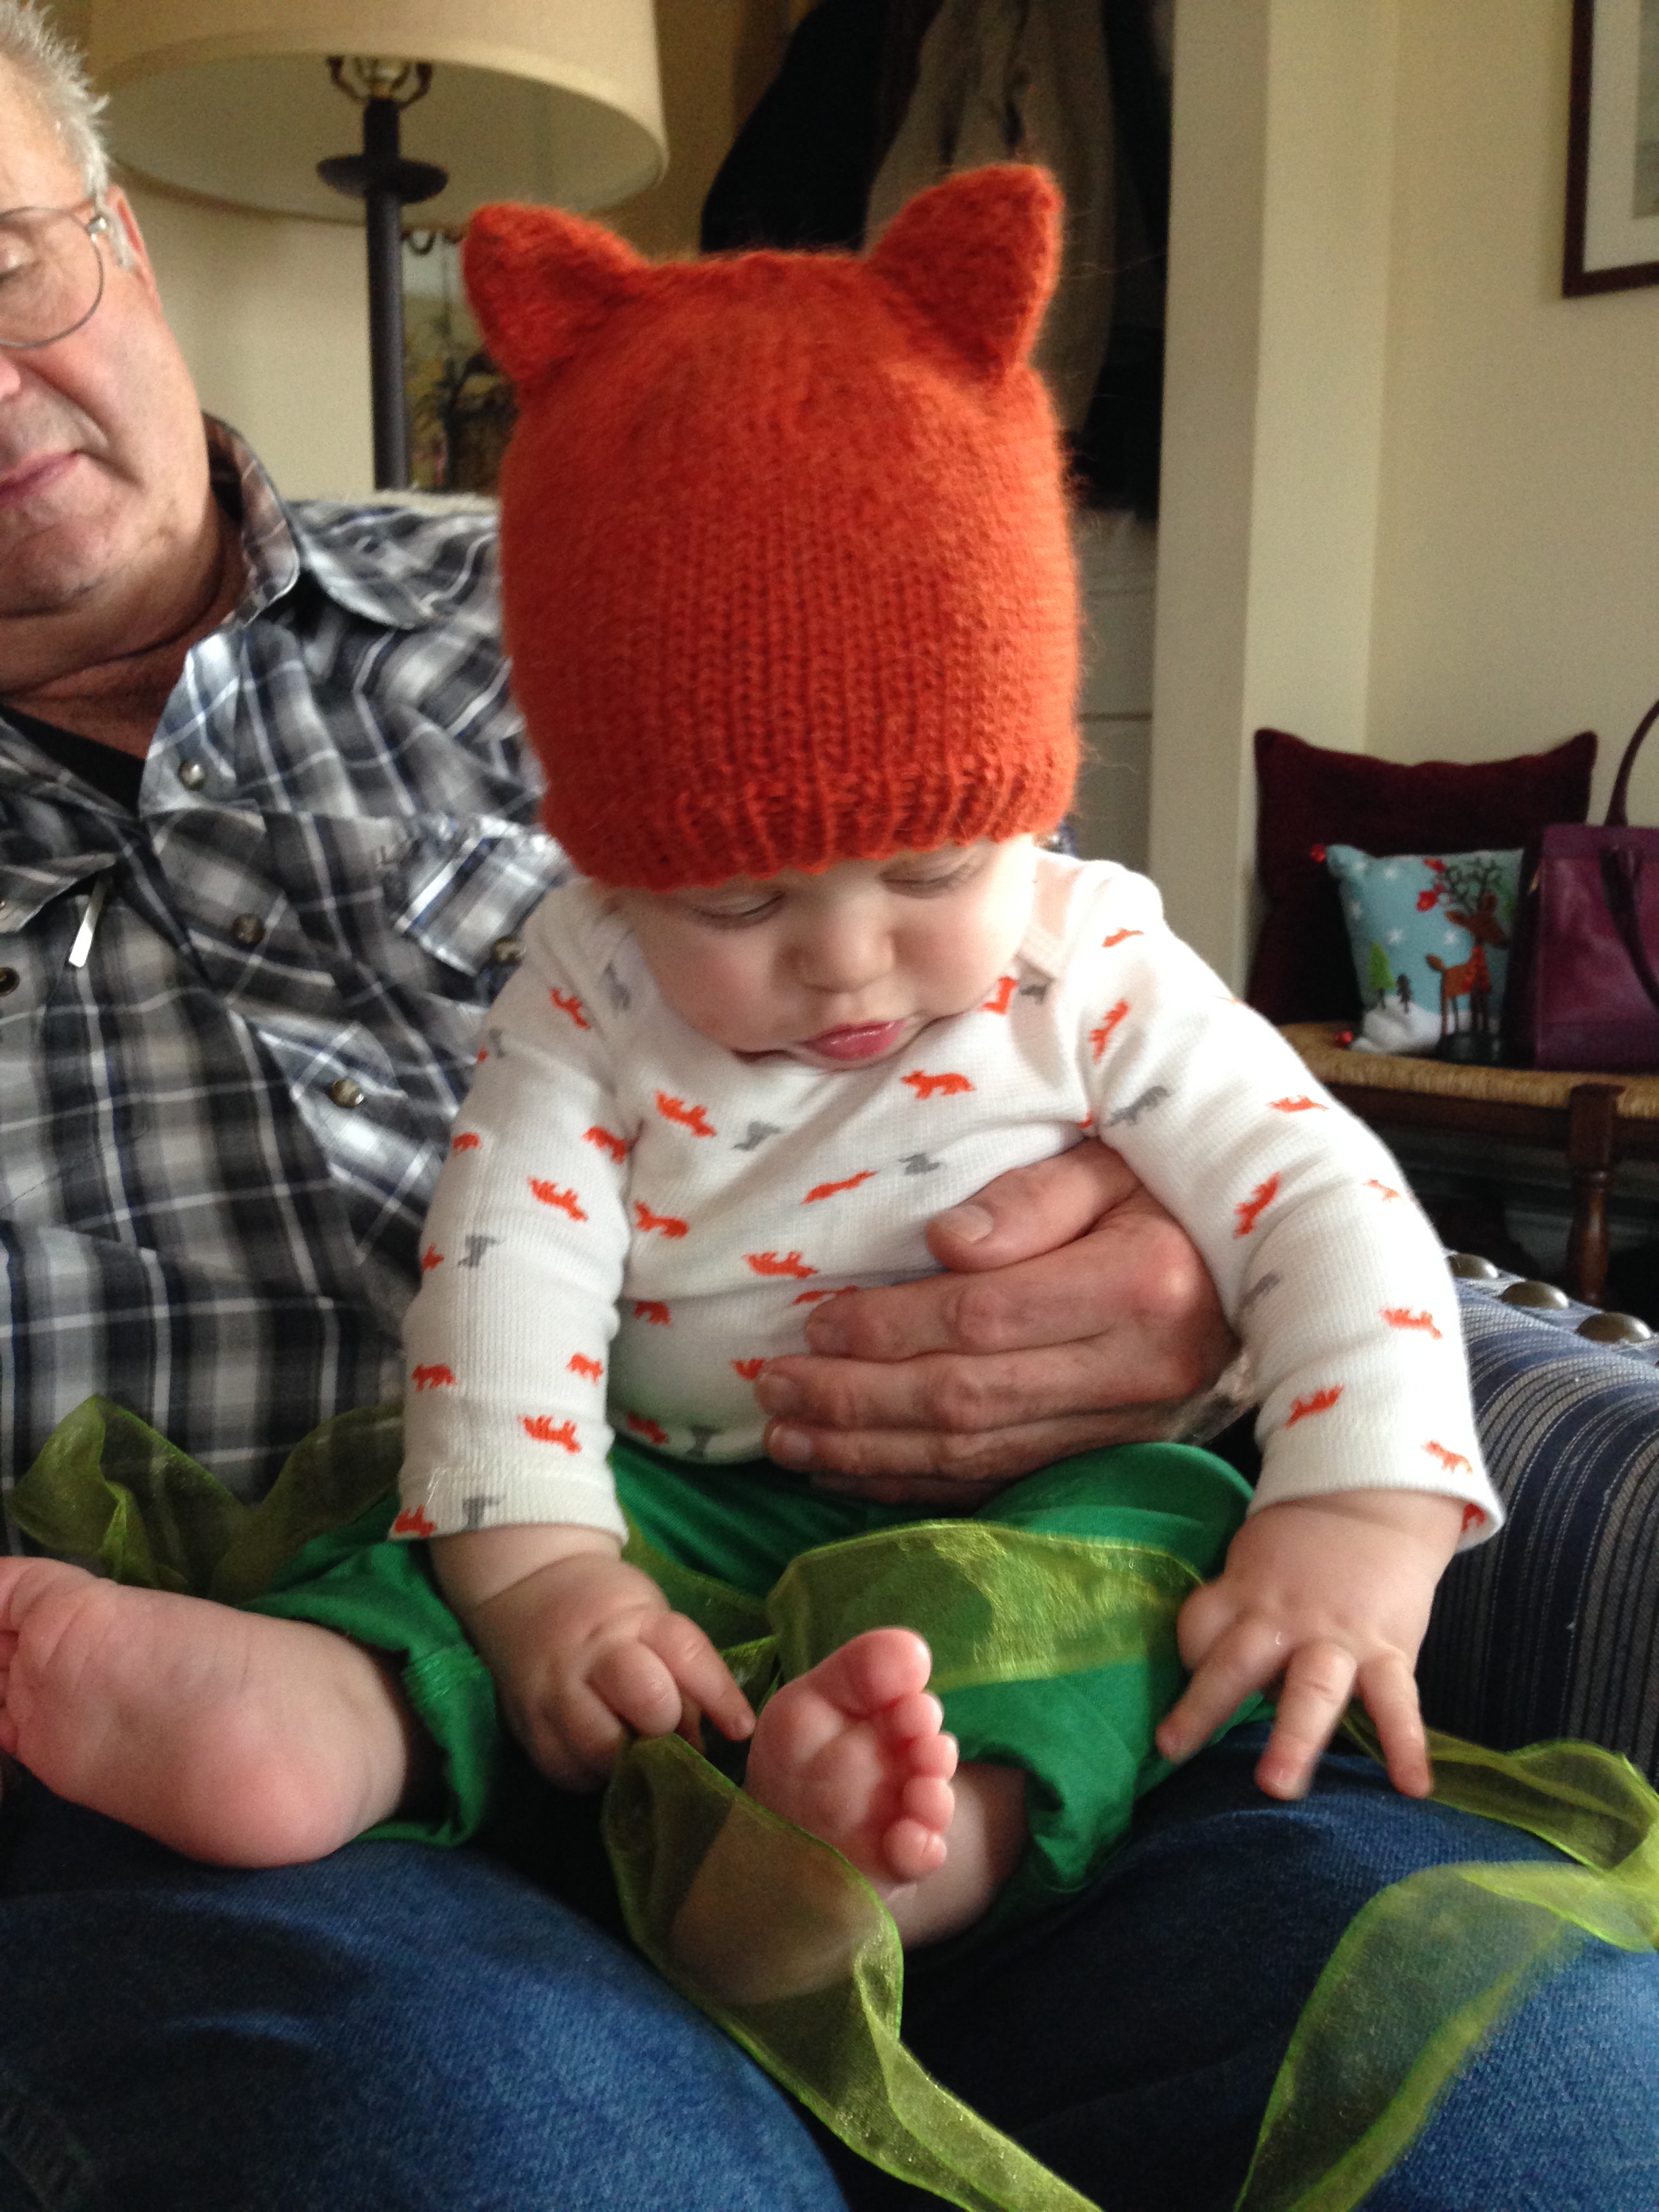
My friend Laura asked me to make her new little one a tiny football hat. I was definitely up to the challenge. I was surprised how few knitted patterns there were floating around Pinterest. Most of the patterns are crochet, which can be made very quickly, but for a football hat I think knit has more room for detail.
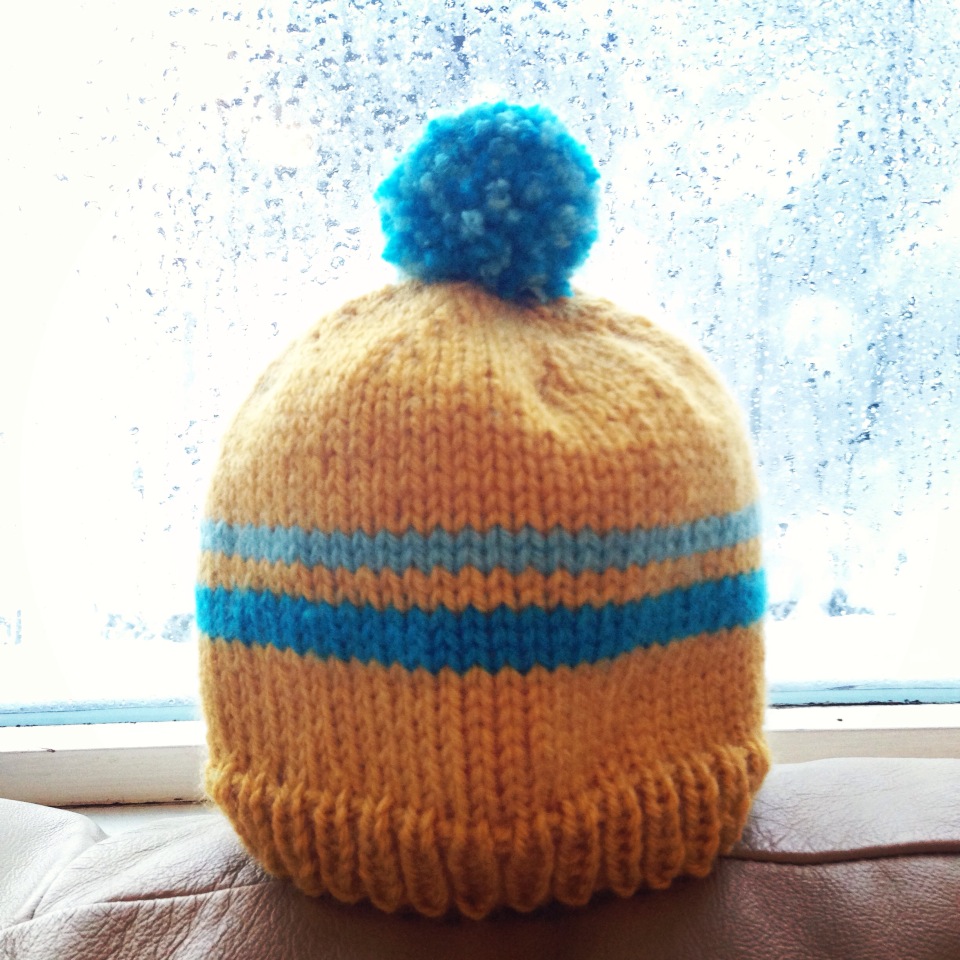
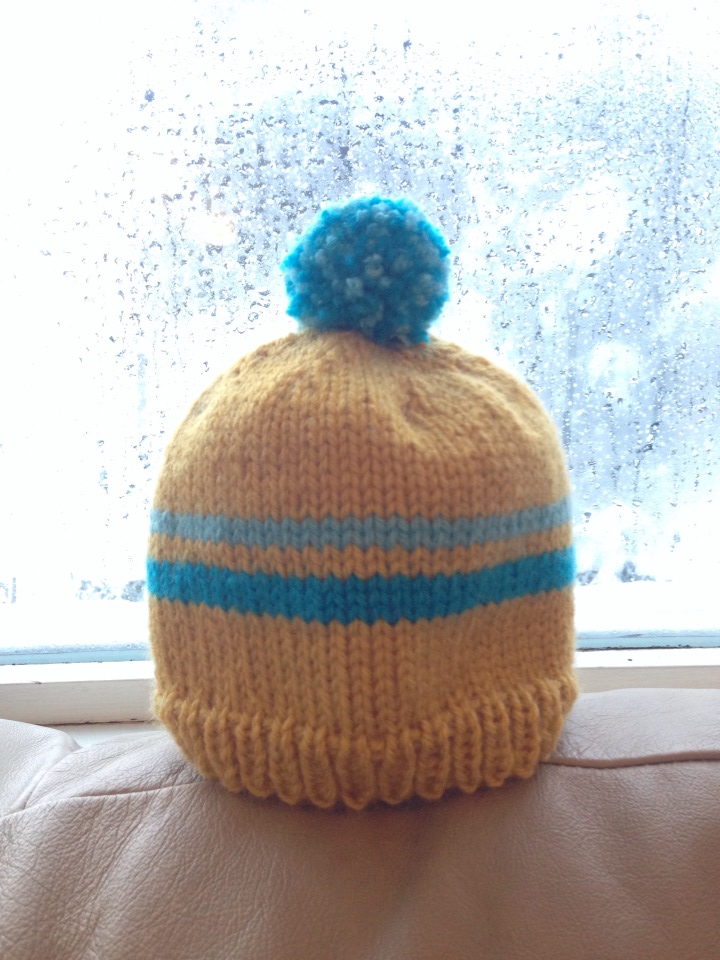
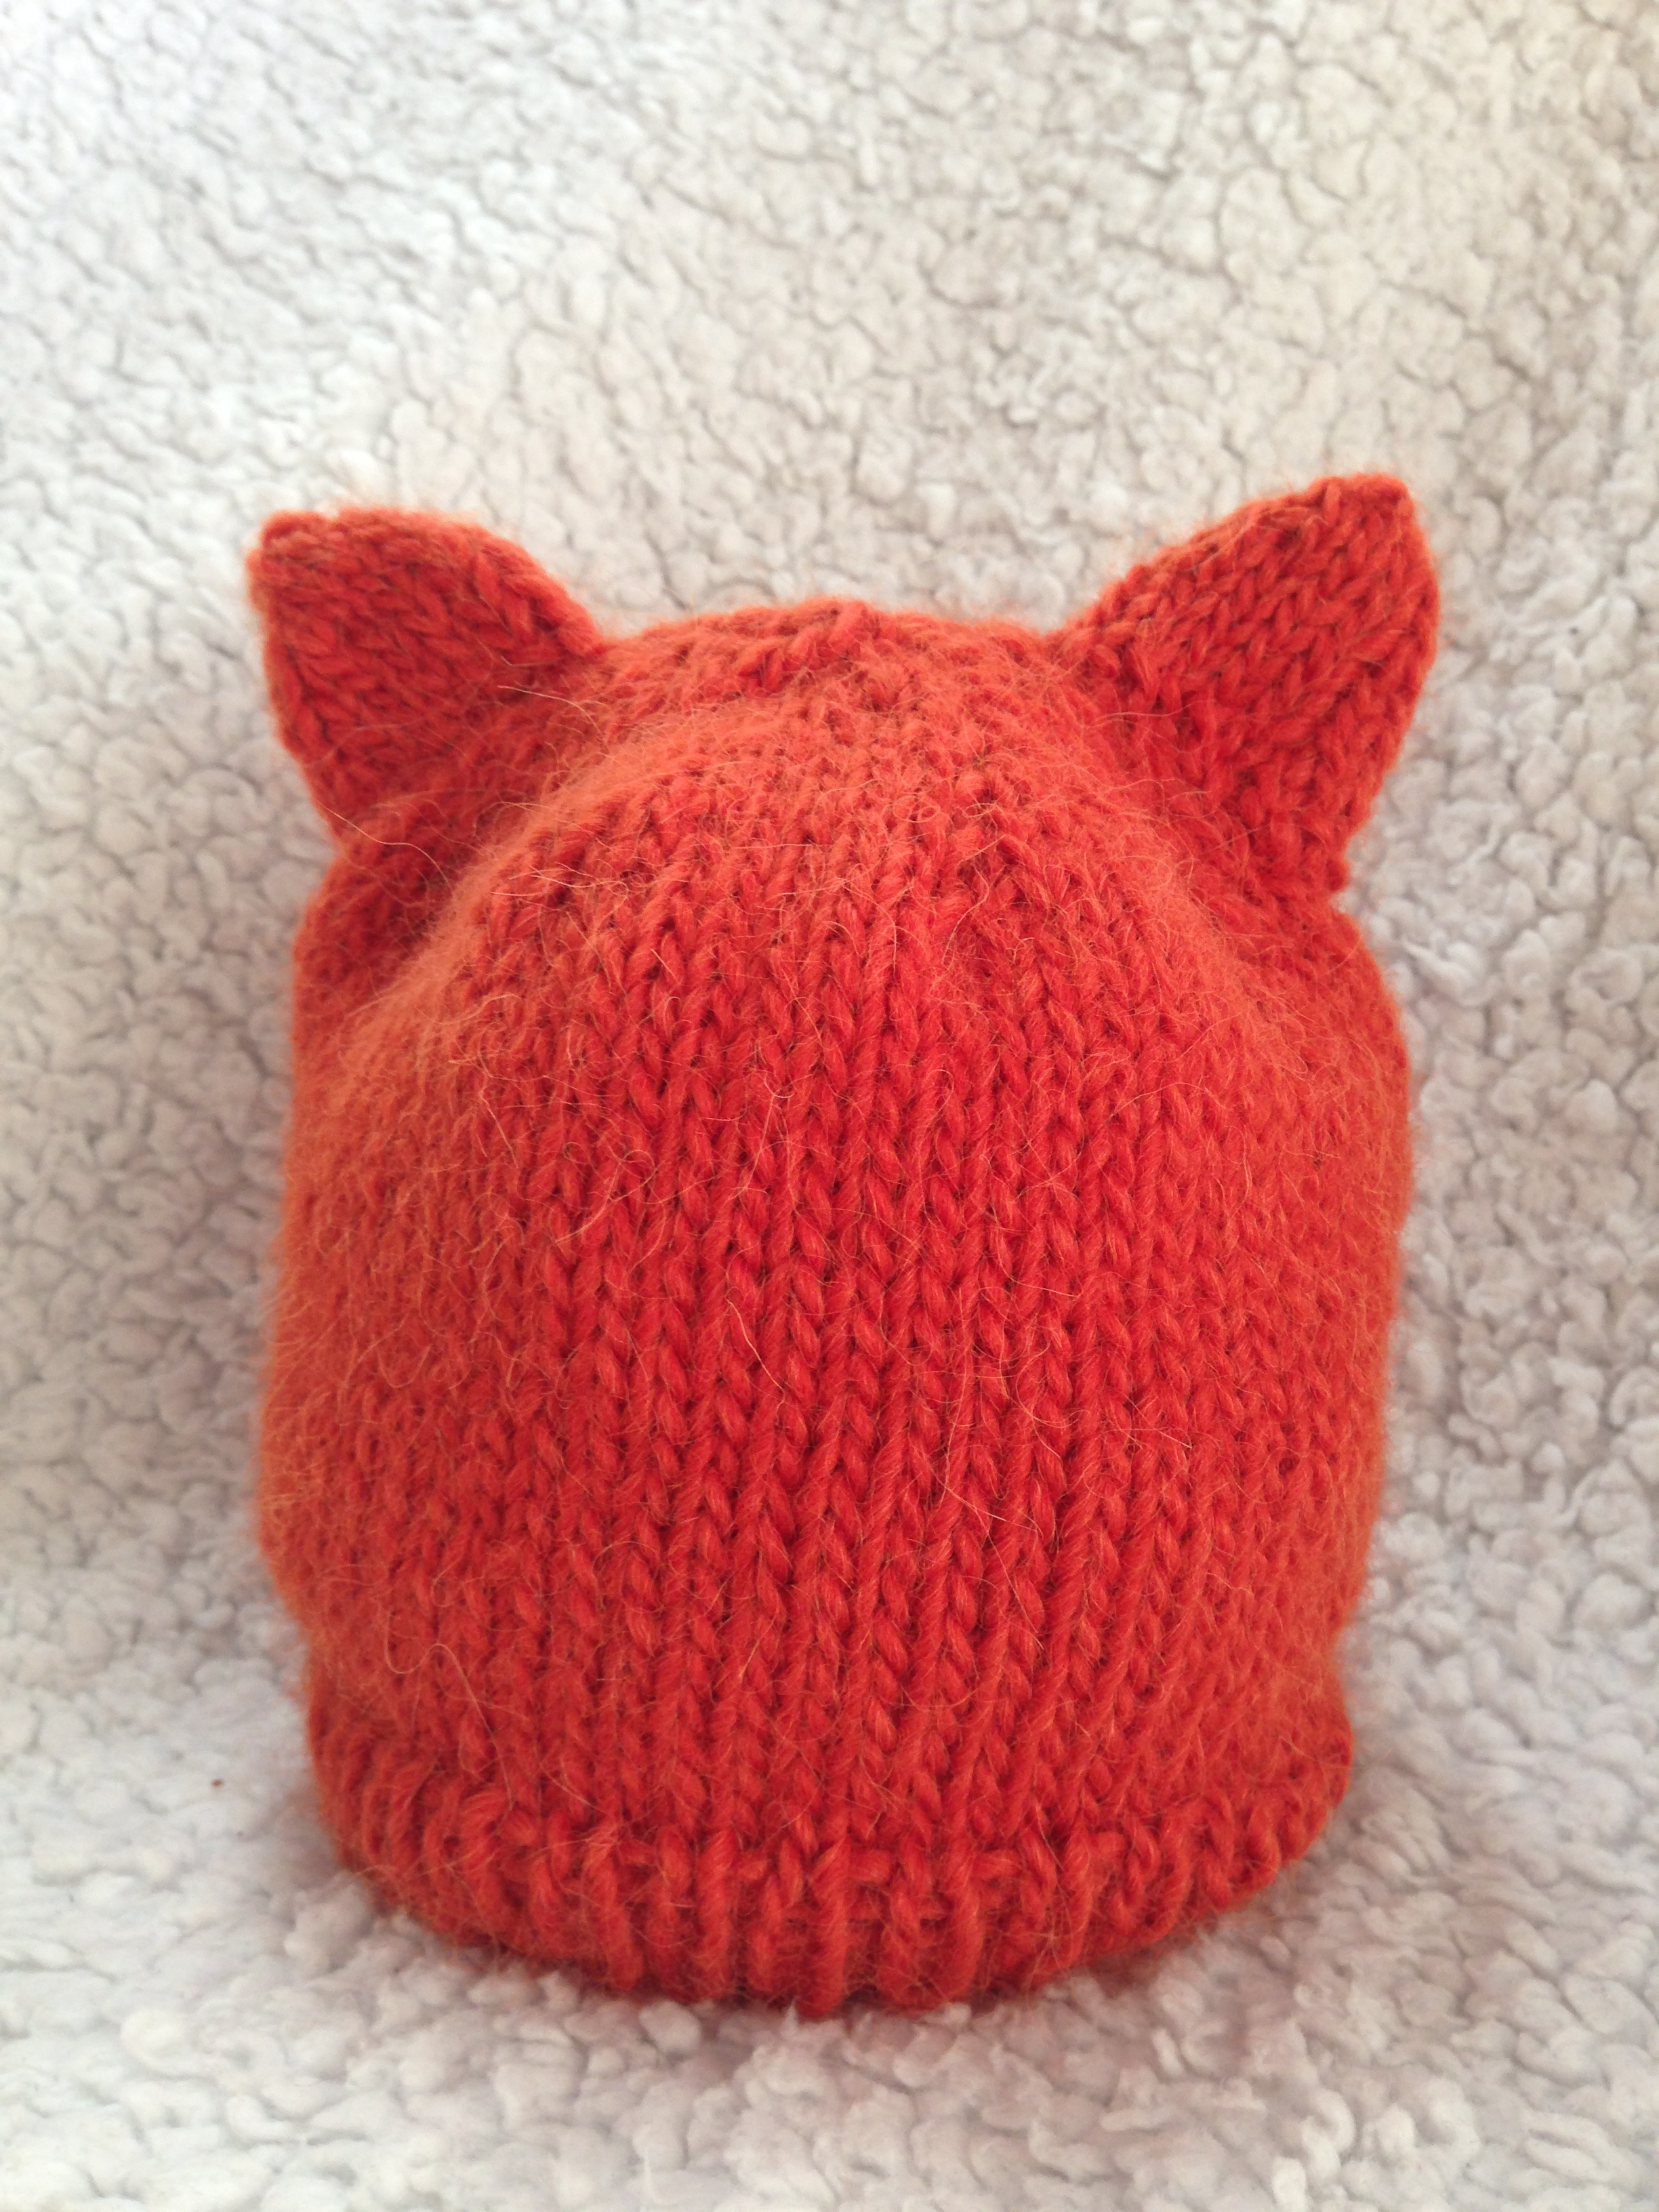
This hat is so cute and teeny! It's based on a tiny Steelers hat I made Laura's second child a couple of years ago.
Preemie Football Hat -- Free Pattern | Alaska Knit Nat
Photo courtesy of www.laurastennetphotography.com
Materials:
Red Heart Brand worsted yarn in white and brown
size 8 double pointed needles
darning needle
Abbreviations:
k1, p1 = knit one, purl one ribbing
k2tog = knit two stitches together
Directions:
With your double pointed needles, cast on 56 stitches (14 stitches per needle) in brown. Join your work, being sure the stitches aren't twisted and k1, p1 rib for three rounds.
Knit two rounds regularly and switch to the white. No need to cut the brown yarn. Knit two rounds in white and cut leaving an 8-inch tail. Bring up the brown and knit 15 rounds. Knit two rounds white without cutting the brown. Cut the white leaving an 8-inch tail and knit one round in brown. Decrease as follows:
*k2tog, k6* Repeat * till end of round
K one round
*K2tog, k5*, repeat * till end of round
K one round
*K2tog, k4*, repeat * till end of round
K one round
*K2tog, k 3*, repeat * till end of round
K one round
*K2tog, k 2*, repeat * till end of round
K one round
*K2tog, k1*, repeat * till end of round
*K2tog*, repeat * till end of round.
Cut yarn leaving an 8-inch tail. Using a darning needle, weave in all ends.
For the football stitches, thread a darning needle with a 24-inch length of white yarn. On the front of the hat, whipstitch the vertical line using short diagonal stitches stacked on top of one another. Then run three wide stitches perpendicular to the vertical line. Tie off the yarn and weave in the end.
To make this hat for a newborn-3 month size, cast on 64 stitches and follow the same pattern.
Preemie Football Hat -- Free Pattern | Alaska Knit Nat

12/22/13

Retro Baby Ski Hat -- Free Pattern

I'm getting down to the knitty gritty here for Christmas presents. I just had one more hat on my list and that was for my best friend's new baby.
I knit this up in just a couple of hours -- and you can too with this simple pattern.
Retro baby ski hat -- Free Pattern | Alaska Knit Nat
Retro Baby Ski Hat -- for a 3-6 mo. baby
Materials:
Vanna's Choice worsted weight yarn -- mustard, teal and light blue
Size 9 circular needles
size 9 double pointed needles
darning needle
large fork or pom pom maker
Abbreviations:
k1, p1 = knit 1, purl 1 ribbing
k2tog = knit two stitches together
Directions:
With your circular, cast on 64 stitches with mustard color and knit last stitch to first stitch without twisting the stitches. K1, P1 for six rounds. Knit 8 rounds in stockinette stitch.
Switch to teal and knit three rounds. Do not cut mustard yarn.
Cut teal yarn with an 8-inch tail. Switch to mustard yarn and knit two rounds.
Switch to light blue and knit two rounds. Do not cut mustard yarn.
Cut light blue yarn with an 8-inch tail and knit 10 rounds with mustard.
Begin decrease as follows:
Place a marker if you need to, but I can tell where the beginning of the round is based on the stripes.
K2tog, K6, repeat till end of round
Knit one round
K2tog, K5, repeat till end of round
K one round
K2tog, K4, repeat till end
K one round while transferring to double pointed needles. Or knit the round and transfer stitches — whatever’s easier for you.
K2tog, K3, repeat till end
Knit one round
K2tog, K2, repeat till end
Knit one round
K2tog, K1, repeat till end
K2tog, repeat till end.
Cut yarn leaving a long tail. With darning needle, draw up remaining stitches and weave in all ends.
For the pom pom:
Take both the teal and light blue yarn and wrap them around a large serving fork till it's pom pom sized. With a doubled piece of yarn about one foot long, tie the yarn around the middle tine and remove from the fork. Cut the loops and trim pom pom to your liking. Using a darning needle, attach to top of hat. To better secure pom pom, run the yarn back up through the pom pom and back down into the inside of the hat.
Retro baby ski hat -- Free Pattern | Alaska Knit Nat

Simple Fox Hat -- Free Pattern

In case you haven't noticed, foxes are really in right now. This season I've already crocheted a nifty fox basket and sewn several felt fox ornaments. I really wanted to make a fox hat for a friend's baby, but I'm pretty terrible at fair isle and halfway through my first attempt, I scratched the whole thing. The snout was all scrunched and I didn't like the look of it.
I decided on something much simpler -- my regular old hat pattern with some ears sewn on top. I winged the ears, but I really like how they turned out. For this project I used some Montera Classic Elite llama/wool chunky yarn I'd been coveting for some time. This hat is fuzzy, warm and downright delightful.
Simple Fox Hat -- Free Pattern | Alaska Knit Nat
Here's what you need:
1 skein of orange chunky yarn (I used Bolsita Orange from Montera Classic Elite)
size 9, 16-inch circular needle
one set of size 9 double pointed needles
darning needle
Size: This pattern fits a 12-18-month baby. For a larger hat (2T-3T), cast on 72 stitches and follow the same pattern. For a smaller hat, knit this same pattern on size 8 needles.
Gauge: I do not gauge my work, but according to Montera yarn's website, it should be 3.5-4 sts/inch on size 9 needles.
Abbreviations:
k2tog= knit two stitches together
For the main body of the hat, cast on 64 stitches on the circular needle and knit last stitch to first stitch without twisting the stitches. Knit 1, purl 1 ribbing for five rounds. Knit in stockinette stitch for 22 more rounds, or until piece measures about 5.5 inches.
Decrease as follows:
Place a marker at beginning of round.
K2tog, K6, repeat till end of round
Knit one round
K2tog, K5, repeat till end of round
K one round
K2tog, K4, repeat till end
K one round while transferring to double pointed needles. Or knit the round and transfer stitches — whatever’s easier for you.
K2tog, K3, repeat till end
Knit one round
K2tog, K2, repeat till end
Knit one round
K2tog, K1, repeat till end
K2tog, repeat till end.
Cut yarn leaving a long tail. Run the yarn through the remaining stitches with a darning needle and draw up the hole tight. Weave in ends.
Ear (make 2):
Simple Fox Hat -- Free Pattern | Alaska Knit Nat
With three double pointed needles, cast on 16 stitches (5, 5, 6), leaving a 12-inch tail. Connect last stitch to first stitch and begin knitting in the round. Knit 3 rounds.
K2tog, k3, K2tog, k3, K2tog, k4
Knit 2 rounds
K2tog, k2, k2tog, k2, k2tog k3
Knit 1 round
K2tog, k1, k2tog, k1, k2tog, k2
Cut yarn leaving a 6-inch tail. Run yarn through the remaining stitches and draw up tight. Weave in the end on the inside of the ear.
With your darning needle and the long cast-on tail, sew the bottom of the ear closed.
Simple Fox Hat -- Free Pattern | Alaska Knit Nat
As for sewing on the ears, I folded my hat in half and determined the best placement of the ears. I sewed each ear on with the remaining length of cast-on yarn. I didn't use any special technique for sewing, so I recommend whatever you feel most comfortable with. I actually didn't have enough cast-on yarn so I did some touch ups with extra yarn.
Simple Fox Hat -- Free Pattern | Alaska Knit Nat
Now it's up to you whether to stitch a little nose and eyes on the front of the hat. I decided not to as I figured the child's face would be the fox's face. Either way would be cute!
Simple Fox Hat -- Free Pattern | Alaska Knit Nat

11/27/13

Baby Candy Cane Stocking Cap -- Free Pattern

My photographer friend commissioned me to make a cute stocking cap for her holiday baby photo shoots.

I've never made anything so tall and pointy, but I think the effect is perfect. Could a baby look more like an adorable naked Christmas elf?

Photo by Laura Stennett Photography

This pattern is for a 3-6 month head. It's also a great introduction to knitting stripes.

Ho ho hope you enjoy it!

Baby Candy Cane Stocking Cap

Materials:
One skein of red worsted weight yarn
One skein of cream worsted weight yarn (I used Red Heart soft)
Size 9 circular needles
Set of 9 double-point needles
darning needle
pom pom maker or large fork

Abbreviation: K2tog = knit two stitches together

Directions:
With the red yarn cast on 64 stitches on your circular needle. Join with first stitch being careful not to twist the stitches. Begin ribbing in k1, p1 for six rounds.

Switch to white yarn and knit 2 rounds. There is no need to cut the red yarn as the rows are so narrow you can easily bring up the other yarn when you need it.

Continue knitting in stockinette stitch for 25 more rounds changing colors every 2 rounds. Transfer stitches to double pointed needles and begin decreasing as follows (while continuing to switch colors every 2 rounds):

*K2tog, k6, repeat * till end of round
knit 3 rounds
*K2tog, k5, repeat * till end of round
knit 4 rounds
*K2tog, k4, repeat * till end of round
knit 6 rounds
*K2tog, k3, repeat * till end of round
knit 15 rounds
*K2tog, k2, repeat * till end of round
knit 16 rounds
*K2tog, k1, repeat * till end of round
knit 5 rounds
*K2tog, repeat * till end of round
k 4 rounds. Cut yarn leaving a 12-inch tail. Using a darning needle, draw up remaining stitches and weave in all ends.

Make your pom pom and sew it to the top.


Happy Holidays from Alaska Knit Nat!

5/26/13

Old Rain Jacket ===> Baby Rain Pants in 20 Minutes


Our son is just learning to walk, which means crawling is still his preferred method of transportation. Alaska summers can be wet and although yesterday was a balmy 66 degrees and every child on our street was playing out in the sprinkler, most of the time it's a bit chillier. 

Jack has been recently introduced to the outdoors that isn't covered in snow. It's too warm for a snow suit and he keeps mucking up his regular pants. What I really needed for him was a pair of outdoor pants.

I'd long ago posted about making pants from t-shirts and I've also made baby pants from sweater sleeves. Wouldn't it be perfect to cut up an old rain jacket and make pants out of it? Usually rain jackets have adjustable wrist straps, which would totally work to tighten over baby boots. Yes, it can be done!

And thanks to a church rummage sale yesterday, I did it for less than a dollar.

Here's how.

Ingredients:
One large adult rain jacket or windbreaker. Adjustable wrist straps preferred
chalk
fabric scissors
pins 
one foot of half-inch wide elastic
large safety pin
sewing machine
one pair of pants that already fit your baby

This project is super simple. You literally only sew two seams and then sew up the elastic. It took me 20 minutes from start to finish.


Directions:
You'll be using an existing pair of pants as a pattern. Turn them inside out. Take one leg and turn it right side out. Tuck it inside the other leg so it looks like you have a one-legged pair of pants. Fold the pants so the inseam is along the edge. Ta-da! Pants pattern. Study how this looks because you'll be doing this later.


Lay your pattern on top of one of the jacket sleeves so the hem of the pant leg is the end of the sleeve. 
Using chalk, mark the rise and waistband of your pants, about an inch away from the pattern on the rise and three inches above the waistband. This isn't an exact science, but you want enough room in the waistband area so you can fold it down twice and still be able to fit a diaper.
Cut your sleeve along your markings. My jacket had a breathable liner, which I decided to keep 'cause it worked out that way. 


Lay the leg you just cut on top of the other sleeve and follow along those cut lines for the second leg. You are now halfway done with your project.


Turn one leg inside out. As you did with your "pattern," tuck the right-side-out pant leg inside the leg you turned inside out. Line up the cut edges along the rise and pin in place. Sew this one seam. I double stitched it in case Jack is rough on them.


Un-tuck the legs and you should have an inside-out pair of pants with no waistband.


Fold down the waist about 3/4 inch and fold it down again so there are no raw edges. Pin all around the waist.


Turn the pants right side out and sew around the waistband, making sure there is just over a half-inch space to run the elastic through. Leave a small part unsewn so you can run the elastic through. You could do this with the pants inside out, but I like knowing what the outside seam looks like cause I sew totally crooked.


Put a safety pin through the end of the elastic and run it through the waistband. Use the pattern pants as a guide for how tight to make the elastic, or use your child as a model. Mine was sleeping so I winged it. When you've decided how tight the elastic should be, sew both ends of the elastic together with a zig-zag stitch back and forth a few times.


Sew over the opening in the waistband.
Put pants on your baby and let him get dirty out there!


7/31/12

What to Pack in a Diaper Bag


Ok, now that my son is three months old, I feel a bit like a pro when it comes to running errands and not losing my head. There were a few panicky times in the beginning where we found ourselves without a diaper or with a poorly-stocked diaper bag.


I've learned from my mistakes and I'd like to share with you how I pack the diaper bag. I always make sure to restock the bag whenever I think of it so I'm not left in the lurch. Also, I try to keep diapers in the center console of the car just in case I forget to bring the bag, God forbid!

I'll explain the contents just in case the photo isn't clear. Click on the photo to enlarge.


1. Nursing Cover -- This takes up very little space and I like to have it in case I nurse in public where people might be uncomfortable seeing a little boob flesh.

2. Book -- I keep a book in the bag for when I drop Jack off with a babysitter. I'll change the book from time to time. It's always good to give babysitters a little something to do with your baby besides watch TV.

3. Changing Pad with Wipes -- This is my all-time favorite item in the diaper bag. I made this "clutch" from a pattern on the Internet. It unfolds and reveals a pouch that can keep two diapers and a wet wipes case. Click here for the tutorial.

4. Toy -- Again, another good thing to have when you drop off your baby with a babysitter. Also, it doesn't hurt to have if your baby is getting cranky on the go.

5. Diapers -- Ah yes, the item for which this bag is named. I try and keep my bag stocked with about eight diapers. That's enough for several outings throughout the week. Not pictured are two cloth diapers and a small wet bag since they aren't a necessity.

6. Blanket -- You never know when a beautiful sunny day might get cold and blustery, as I learned earlier this summer. A receiving blanket doesn't take up much space and it's a must for all seasons.

7. Burp cloth -- This is a no-brainer item. Whether it's spit-up or drool, I always keep one on hand for quick clean ups.

8. Nursing Pads -- This is the one non-baby item. I sometimes have my own accidents so I always keep a couple of disposable nursing pads in the bag to prevent unsightly leaks.

9. Baby Powder -- Just a typical diaper bag item, but instead of hauling a huge container around I put some in an old poultry seasoning jar. Make sure to place it in a plastic baggie as powder tends to get everywhere.

10. Rash Cream -- Another must-have.

11. Baby Shampoo -- I keep a travel-size bottle of shampoo in my bag in case we have to give Jack an emergency not-at-home bath. You never know when you might have a blowout!

12. Change of Clothes -- I always keep a Onesie, set of jammies, pants, outer layer and socks in a gallon Ziploc bag. Babies will tend to go through more than one outfit a day, what with the drooling, puking, peeing and pooping they do. Be sure to restock whenever you think of it. Don't want to be stuck with a dirty, wet, stinky baby while running errands or while he's with the babysitter.

13. Bottle -- A must-have if you bottle-feed or if you leave your baby with a sitter. Make sure to clean it when you get home.

14. Grocery bags -- These are free and are great for messy clothes, burp cloths, diapers or whatever you want to keep apart from clean stuff or politely toss in someone else's trash.

15. Gallon Ziploc Bags -- I like to be a polite mama-on-the-go. Would you want someone to leave a stinky diaper in your trash? Seal it up in a Ziploc so you don't have to share the smell with others. Also makes a good wet bag for dirty clothes and cloth diapers.

So, that's our diaper bag! Is there anything you put in your bag that I left out? Leave me a comment!

Thanks,
Nat

7/2/12

Hooded Baby Towel and Mitt Set -- A Tutorial

Our son is a tall little fellow and store bought hooded towels are too short for him. I want him to be bundled up and cozy after a bath so I decided to make my own hooded towel out of a plush bath towel.

He's not too sure about this bath thing...


Here's how you can make one too.

Materials:
1 large towel
Sewing machine
Heavy duty needle (optional, but makes the job easier)
Fabric scissors or rotary cutter

Directions:

1. Fold your towel lengthwise or "hot dog" style. Cut a 12 to 14-inch piece from one end.


2. Turn under the raw edge of the big piece and pin in place. With a straight stitch sew across. Go back along this seam with a zig zag to prevent the towel from unravelling. Since my towel had stripes I didn't pin. I just made sure the stripes lined up.


3. Take the big piece and line up one corner on top of the 12-inch piece with the finished edge of the small piece on the bottom. The finished edge is going to be the edge of the hood. You're going to cut a triangle form the little piece so you want to make sure it's the right shape of triangle. I eyeballed how big to make the triangle. I just imagined it as the hood and how big my baby's head is.


4. Cut out the two edges of the triangle and pin it to the corner of the big piece. Save the scraps.


5. Sew along the two edges with a straight stitch.

6. Turn the triangle inside out and there's your hooded towel!


For the mitt:

1. Place your hand on the scrap of towel to figure out how tall you want your mitt. Fold your scrap in half and cut out a rectangle with one side being on the fold.


2. Unfold your rectangle and turn under one of the long edges and sew down.

3. Fold the rectangle in half with the turned under edge on the outside (right sides together) and sew the raw edges.


4. Turn right side out and there's your mitt!

5/19/12

Homemade Cloth Baby Wipes

All right, apparently it's been a full month since my last post, and boy, did that month fly by! Here's the reason I've been so absent:


His name is Jack Oliver and he is a month old. It's been an exciting month and I'm finally settling into a new normal, so let's get back to craftin'!

We have already purchased a Costco-sized box of wet wipes and I'm realizing how we're fast becoming a wasteful family. We are doing a combo of cloth diapers and disposables, so I thought I'd give cloth wipes a try.

Today was the first big garage sale day and for once I'm actually stoked when all a garage sale has is baby stuff. I found some nice clothes for Jack but I snagged several flannel receiving blankets to craft out with.


Homemade wipes are super easy. Since I'm washing cloth diapers anyway, I figured a few scraps of flannel added to the wash wouldn't make a big difference.

Here's what you need to make 32 or so wipes:

2-3 flannel receiving blankets, or a yard of flannel fabric
An empty wet wipes box (sometimes thrift stores have these)
Sewing machine with zig zag stitch

Photo by Amber Telling


Cut your blankets into 7-inch squares. No need to be precise. You'll end up with about 16 squares per blanket.

Using a wide zig-zag (or a serger machine is even better!) sew a border around any unfinished edges. I just incorporated the finished edges into each square.

Fill up your empty wet wipes box. If you have time (and I doubt I'll find myself doing this often) overlap each wipe so that when you pull out a wipe, then next one will come out.

I plan on wetting each wipe as I use it with a spray bottle of water with a small amount of baby oil and baby soap in it. I suppose you could prewet the wipes by pouring some water into the wet wipes box after it's filled. I'm not sure how that works, but I'm sure it's fine.

Once a wipe is used, place it in your designated dirty cloth diapers receptacle. When it's time to wash the wipes and diapers, here's what I do (this is after hours of online research on washing cloth diapers using homemade detergent). I use a combination of equal parts Borax, Arm & Hammer Soda Wash (found next to Borax in grocery store) and Oxy Clean. I have a front loading HE machine and I run it through two cycles. The first cycle I run on cold and add one tablespoon of detergent. The next load I select an extra rinse cycle, add another tablespoon of detergent and run the load on hot.

Either line dry or dry on hot for more than an hour.


4/18/12

Turquoise Vintage Circus Jungle Nursery

When I was about four months pregnant, my close friend Kasandra asked me, "So, what is your theme going to be for the nursery?" Theme? Uh....under the sea? Wild west? I just don't think in themes. So I thought about the colors I love -- red, turquoise, purple, teal, orange, yellow -- oh wait -- I love all the colors.

When we first moved into our place Stephen and I painted two of the rooms Martha Stewart Vintage Map, which, obviously, is a light blue color (I can't get over product color names).  So, conveniently enough when we found out we were having a boy we didn't have to repaint the walls.

Honestly, though, I have a problem with classic nurseries. The baby is only a baby for a couple of years so I see no point in decking out a room with paint and decals and décor that will only be applicable for a short amount of time. Also, I wanted our baby room to be a space that I'd want to hang out in.

I love vintage toys and they all seem to have vintage colors like rusty orange and faded blue. I also love the look of Hipstamatic photos. The colors are saturated but a little off. They kind of remind me of old circus photos.

A few months ago I found someone on Craigslist who was selling several Fisher Price toys from the '60s. I instantly scooped them up and after some light contemplation I had an answer for Kasandra: the theme will be vintage circus. What I ended up with I can't exactly explain in terms of a theme, hence the bizarre blog title of Turquoise Vintage Circus Jungle Nursery.

I love how the room turned out. It look very little effort to transform what used to be the booze and guns room into a comfortable space to play and care for our son. Due to space constraints, my husband is sharing this room with baby. Stephen lays claim to the closet and the upper part of the cube shelf is his retro music station. But I think it blends well with the rest of the room.

I pride myself in finding good used items, so this room was a relative bargain. All the furniture is from thrift stores, garage sales, or was given to us. Most of the decorations were handcrafted by me, friends and family or were printed off the Internet and put into cheap frames.

We have many meaningful things in this room: a slate that my godmother used when she was a child, my older sister's teddy bear, friends' artwork, embroidery that was in my nursery, "A Child's Garden of Verses" that belonged to my husband's grandfather, a crib that all four of the kids in my family used, a bookshelf my grandfather made in the '50s, a homemade sock monkey that belonged to my older brother and photos taken by close friends.

The love from our family and friends spans wall to wall. I hope you enjoy these photos as much as I do. Click on a photo to enlarge.

Curtains from Ikea, blanket made by me, crane mobile and paint chip bunting also made by moi, our old garage sale chair and ottoman, my Oriental rug from college

Bookshelf made my my grandfather in the '50s, thrift store bedside table and lamp

Craigslist vintage toys, slate belonging to my godmother, thrift store toys, new German wooden toys from grandma

Homemade fitted sheet, giant sock monkey and red monkey painting from our friend Ashley, crib made in Sweden and purchased in England for my brother in 1971, wall quilt made by my mom, jungle painting scrounged from a moving van, space-age TV scrounged from a dumpster

From left to right: My childhood bear Bosh, older sister's bear Beary, new Pooh sitting on vintage telephone bench converted to a toy chest

Artwork and haiku by my old friend Joe

Craigslist cube shelf, painting by original Jack, thrift store toys, photos by our friend Amber
Bins from Jo-Ann's


LinkWithin

Related Posts Plugin for WordPress, Blogger...