

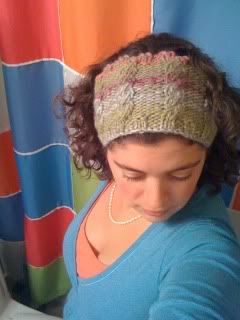
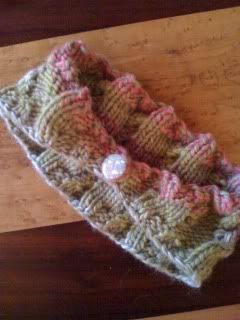
We sell tapered cabled headbands at work and I figured I could probably make one. Here is the pattern!
Needles: size 10 circular
Yarn: Lamb's pride bulky (I used two worsted weights together to create the color combo)
Cable pattern will be made on the wrong side of your work.
Cable pattern:
Row 1: K4
Row 2: P4
Row 3: C4F (transfer two stitches to cable needle and set in front of work. Knit the next two stitches then Knit the two stitches from the cable needle)
Row 4: P4
note: I don’t make the cable pattern on the outermost corners of the headband because there are so few rows.
CO 72 St.
Row 1: K2, P2
Row 2: K2, P2 to last two stitches. Turn work.
Row 3: Slip 1 purlwise, P1, K2, place marker. P2, K2 to last two stitches. Turn work.
Row 4: Remove marker. Slip 1 purlwise, P3, place marker. Start cable pattern: K4, P4 to marker. Turn work.
Row 5: Remove marker. Slip 1, P3. Place marker. K4, P4 to marker. Turn work.
Row 6: Remove marker. Slip 1, K3. Place marker. P4, C4F to marker. Turn work.
Row 7: Remove marker. Slip 1, K3. Place marker. P4, K4 to next marker. Turn work.
Continue rows 4-7 till there are five groups of four stitches on the outside of the stitch markers (22 stitches). *If you want a narrower headband, knit until there are 18 stitches on the outside of each stitch marker.*
Row 8: When both sides have 22 stitches, start the next row without removing the stitch marker and knit in the cable pattern to the next marker. Turn work.
Row 9: Without removing the stitch marker, continue in the cable pattern to the next marker. Remove marker and knit the next four stitches according to the cable pattern. Turn work. Place marker.
Row 10: Place marker and knit in cable pattern to next marker. Remove marker and knit 4 stitches according to cable pattern. Turn work. Place marker.
Continue Row 10 till there are only two stitches on the outside of both markers.
Row 11: P2, K2 removing all markers
Row 12: K2, P2 removing all markers
Row 13: BO in ribbing pattern (K2, P2)
Weave in ends. Sew on a button to one corner. There should be a hole you can put the button through easily.
This is one of the prettiest headbands I've seen! I definitely plan to make it. Can you possibly tell me about how much yarn it takes using chunky/bulky weight? I wonder if about 50 yards (like the Plymouth Brunello) would be enough? It actually suggests #13 needles, and I'm using #15 for a small triangle scarf. Thanks so much for sharing this nice design!
ReplyDeleteNorma B.
Dear Norma,
DeleteThanks for taking a look at my pattern. It's been so long since I last made it, I don't remember the yardage. But the pattern is based on the Calorimetry pattern on Knitty.com and they recommend 93 yards. I feel as though I use less yarn in my pattern than that one calls for, but I would worry 50 yards might not be enough.
I'm sorry I don't have a more definite answer for you, but if you do end up making it, please let me know how it goes!
-Natasha
Just found this pattern and I love it. Thanks for sharing...
ReplyDeleteYou're welcome, Frances. I have lots of patterns on my new site, alaskaknitnat.com -- all free!
DeleteBest,
Natasha